Fencing Pliers | Fence Pliers
Fencing Pliers, Fence Pliers, Fence Tool, Staple Puller, Multi Tool, Hand Tools, Nail Puller, Cutting Pliers, Cutting Wire, Pliers with Hammer Head, Stretching Wire Pliers, Wire Cutters, Fencing Multi Use Pleirs Staple Hammer.
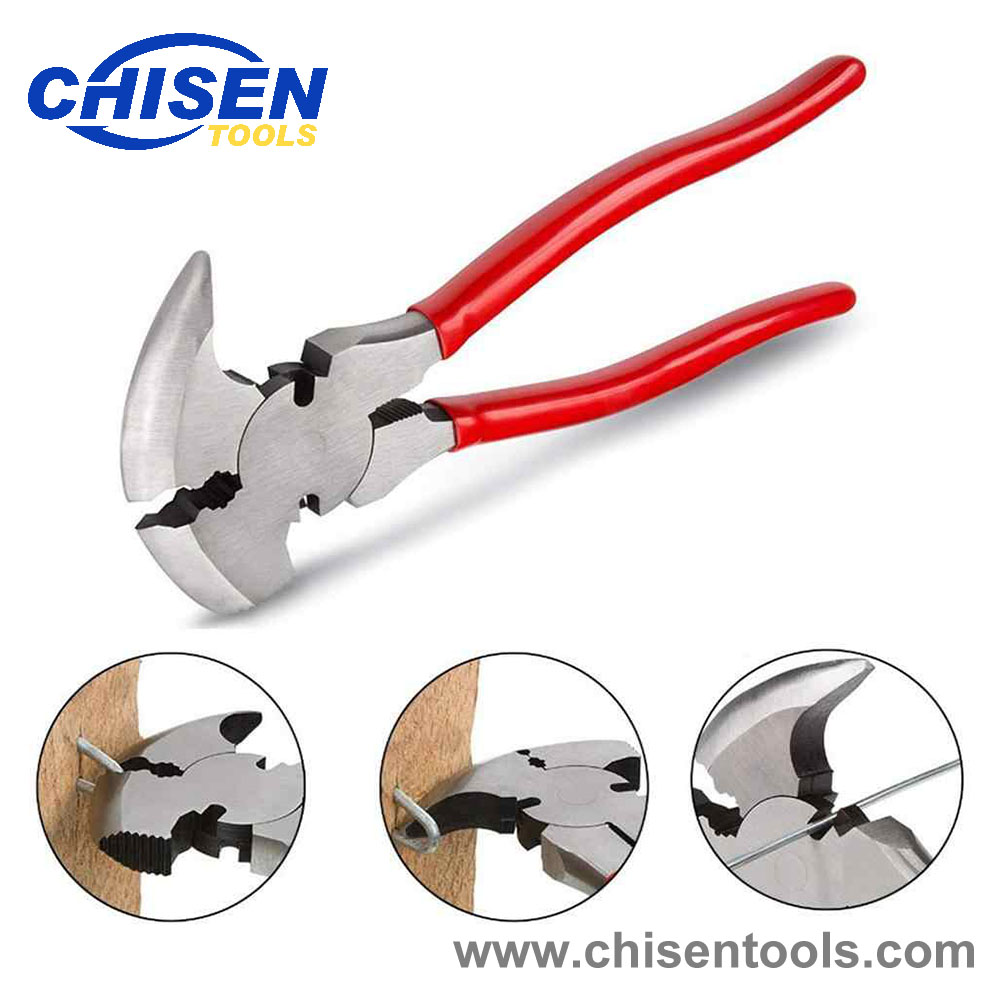
Fencing Pliers | Fence Pliers
Artical No.: CS01015
Standard: DIN ISO 5743, ASME B107.20M-1998
Size: 10.5"(270mm)
Optional Material: Carbon Steel, Chromium-vanadium Steel
Optional Finishing: Black and Polished, Nickel Plated, Chrome Plated
Handles: PVC Dipped Handles
Optional Packaging: Blister Card, Double Blister, Plastic Hanger
Features: 10-1/2 inch heavy duty fencing pliers, 7/32 inch cutting capacity.
Made From polished Steel alloy For Long Lasting Performance And Preventing Rust.
Soft Plastic Coated Grip.
Corrugated hammer head, two wire cutters, staple grips, and wire grip for stretching wire.
Perfect For Carpenters, Construction, Handymen.
A MUST HAVE TOOL!
Looking for a handy and multipurpose tool? The long wait is over, a must have tool is here! This Bates Pliers is a mutli-purpose in just one tool you can use it as a fencing pliers, fence pliers, fence tool, staple puller, multi tool, hand tools, nail puller, cutting pliers, cutting wire, pliers with hammer head etc. It is made from polished steel alloy for long lasting performance and prevent from rusting.It has corrugated hammer head, two wire cutters, staple grips, and wire grip for stretching wire. These Bates pliers are perfect for carpenters, construction and handymen.
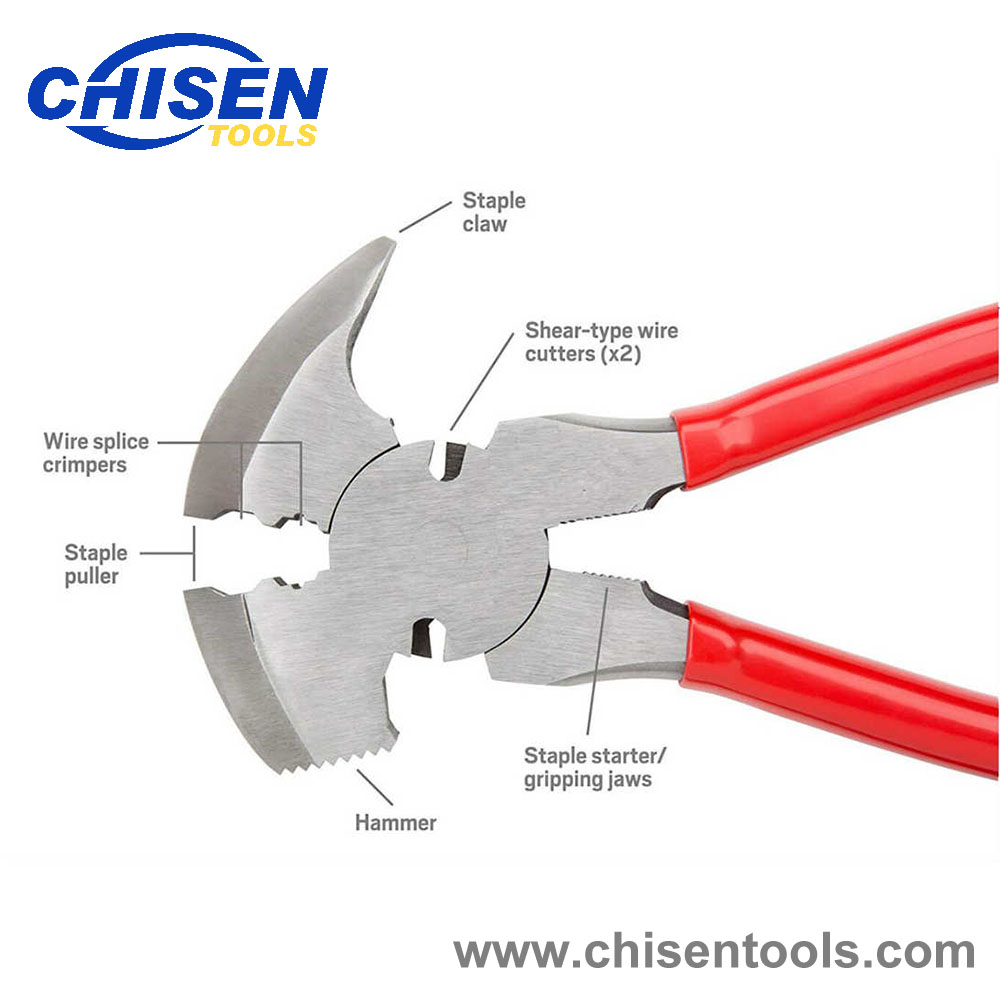
• Long handles for extra leverage
• Triple injected grips for comfort and fatigue reduction
• Heavy duty Nickel Chromium construction
• Designed for construction and maintenance of wire fences on wood and metal posts
• Functions:
- Hammer for easy nail & staple insertion
- Nail puller prong
- Staple puller
- Staple holder for holding staples in place
- Wire cutter
- Pliers for stretching wire
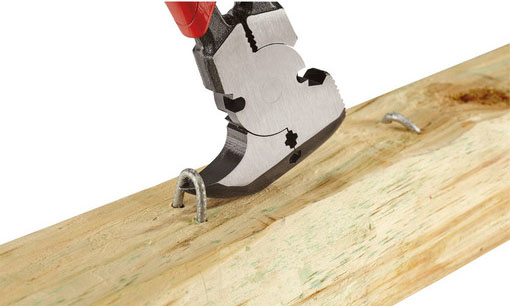
Clawing Staples
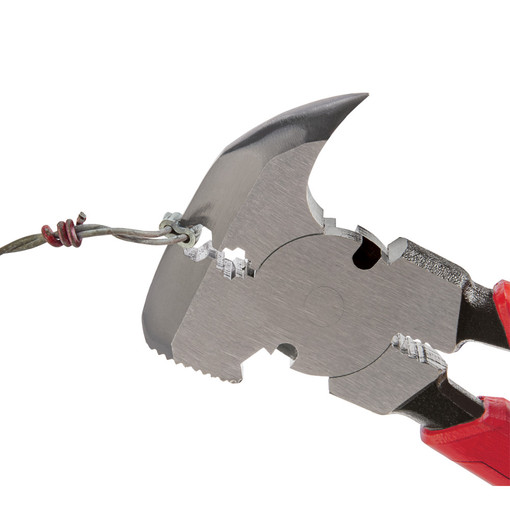
Crimping Wire Lugs
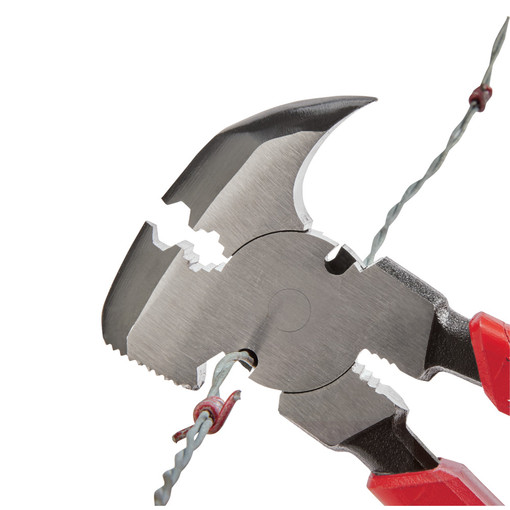
Cutting Wire
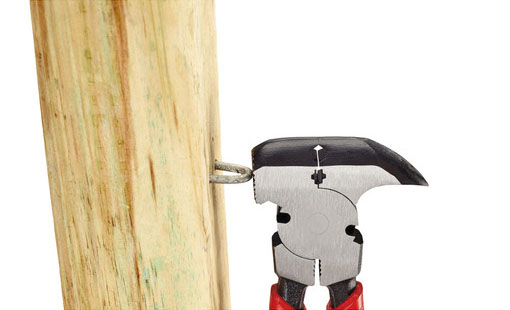
Hammering Staples
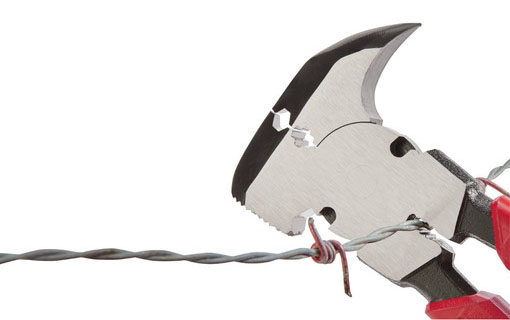
Twising Wire
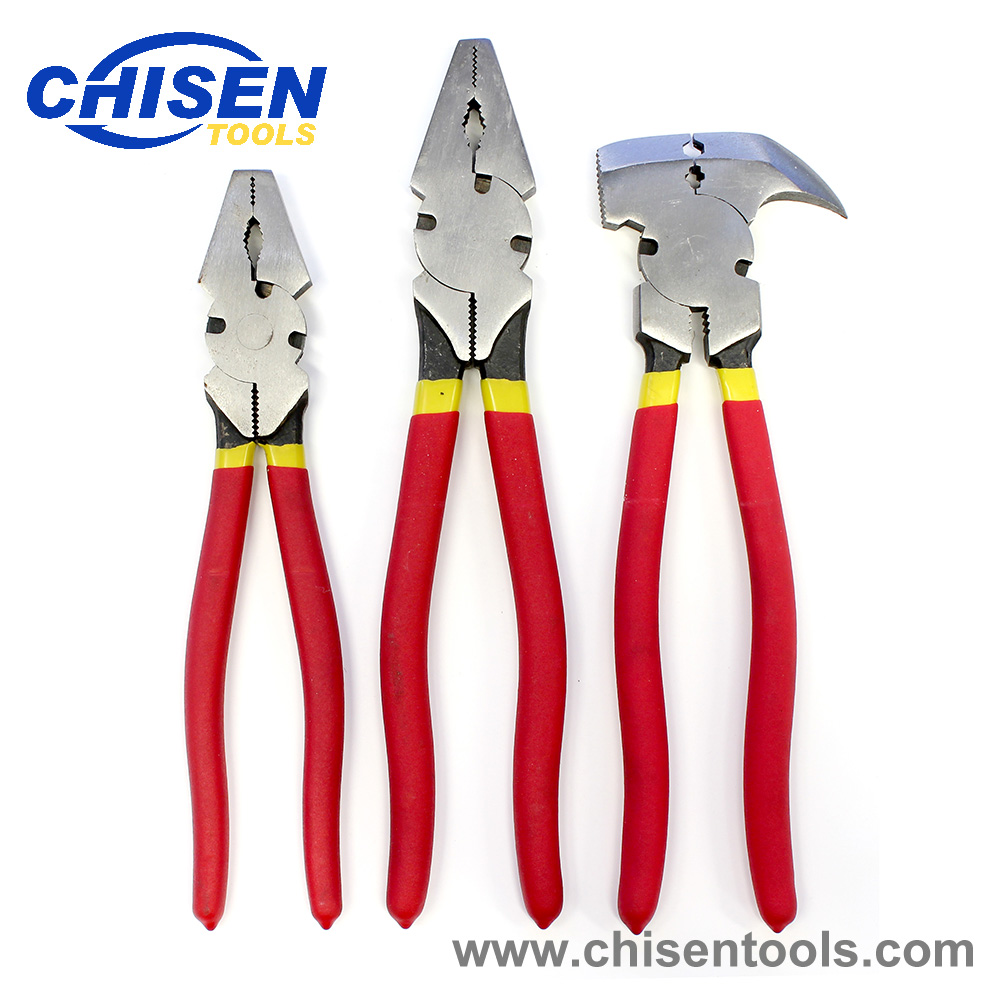
Including:
One piece Parrot Beak Pliers, 10" (250mm)
One piece Bull Nose Pliers, 10" (250mm)
One piece Bull Nose Pliers, 12" (300mm)
Features:
Strong, durable, and reliable.
Multi-use.
Made for fencing.
Whites Rural multi-use fencing pliers are strong, durable, and reliable to make fencing easy.
Available in two styles:
Bull Nose Pliers
3 wire cutters - plenty of length to provide leverage.
2 different wire grips - suits any diameter.
Long handles provide extra leverage.
Parrot Beak Pliers
Wire cutter and grips.
Hammer end.
Staple puller ‘parrot beak’
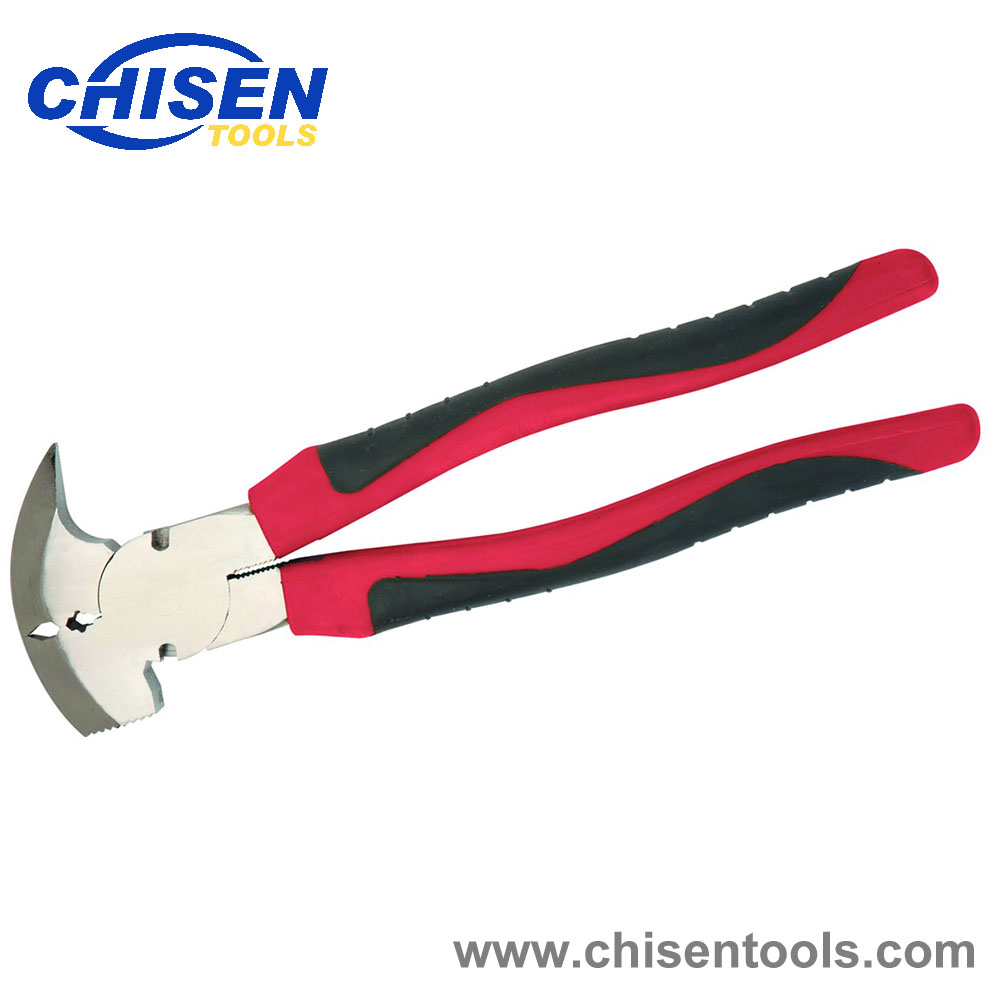
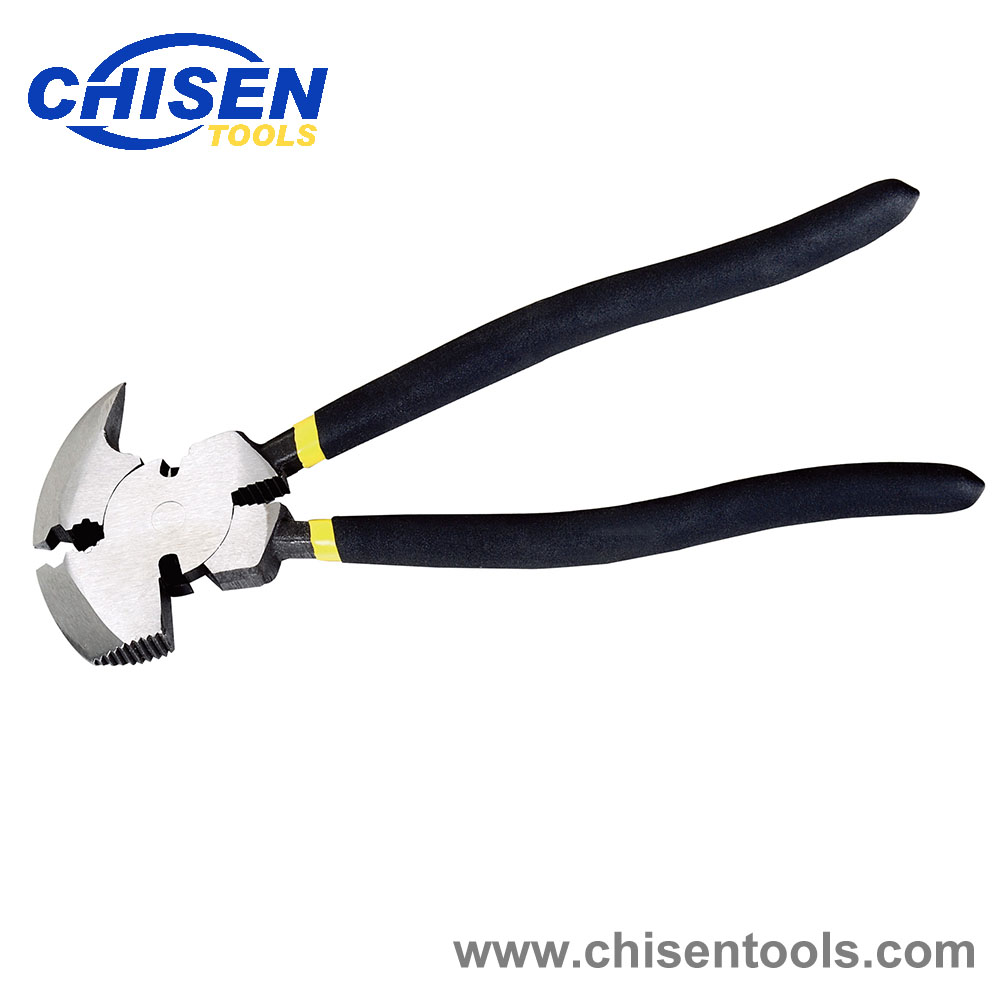
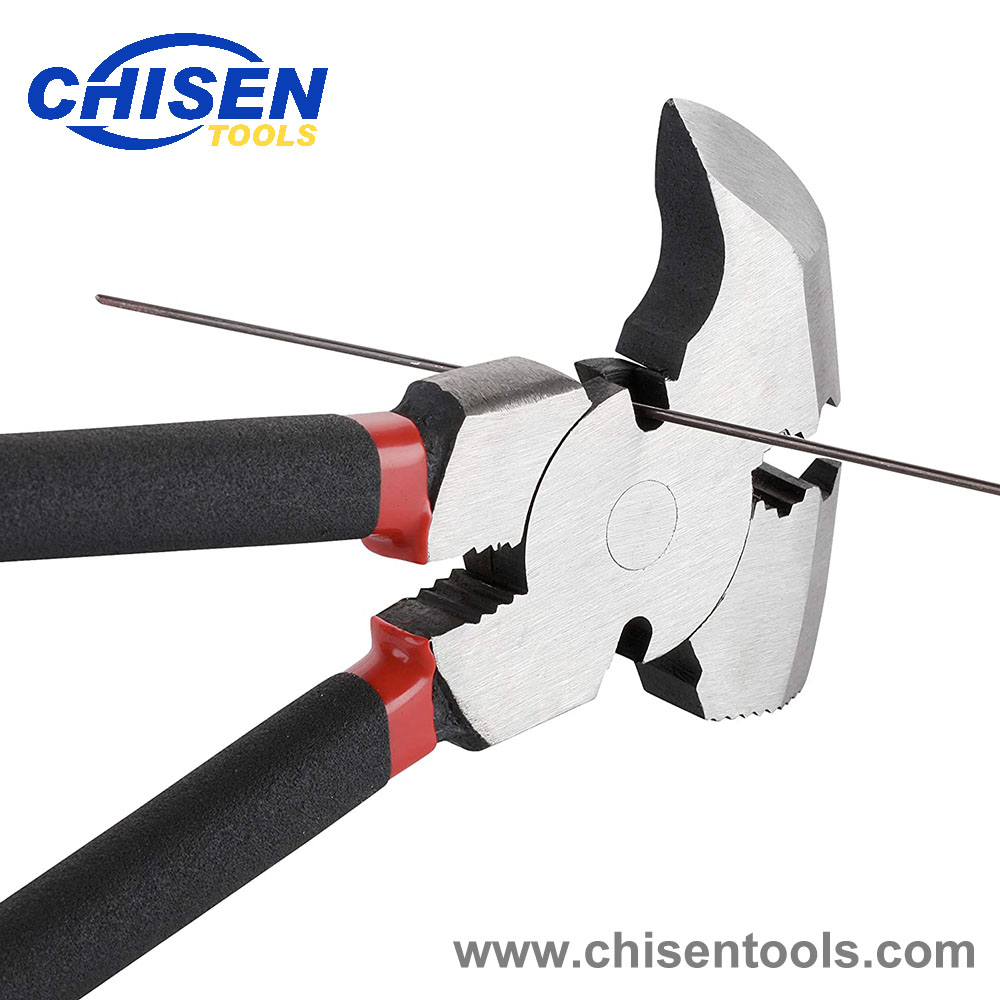
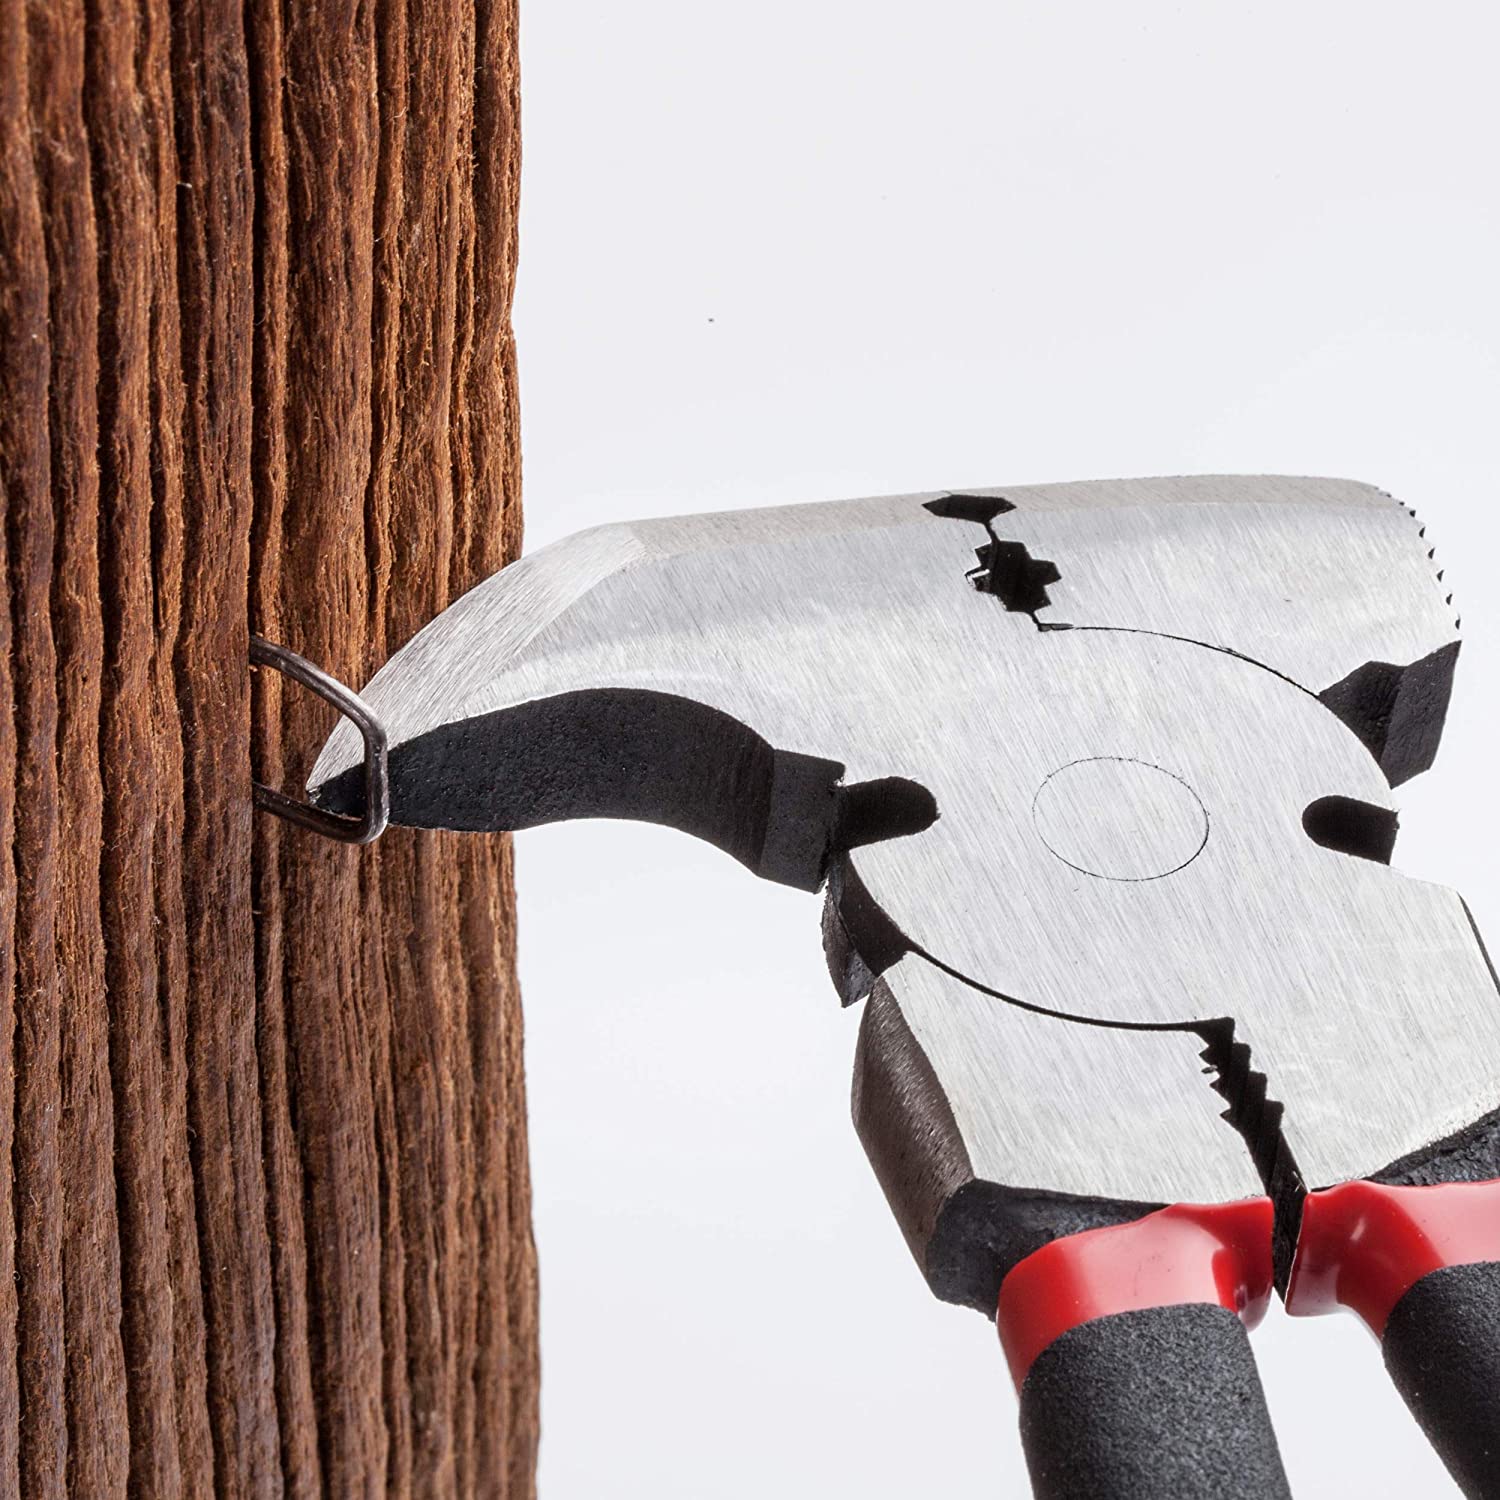
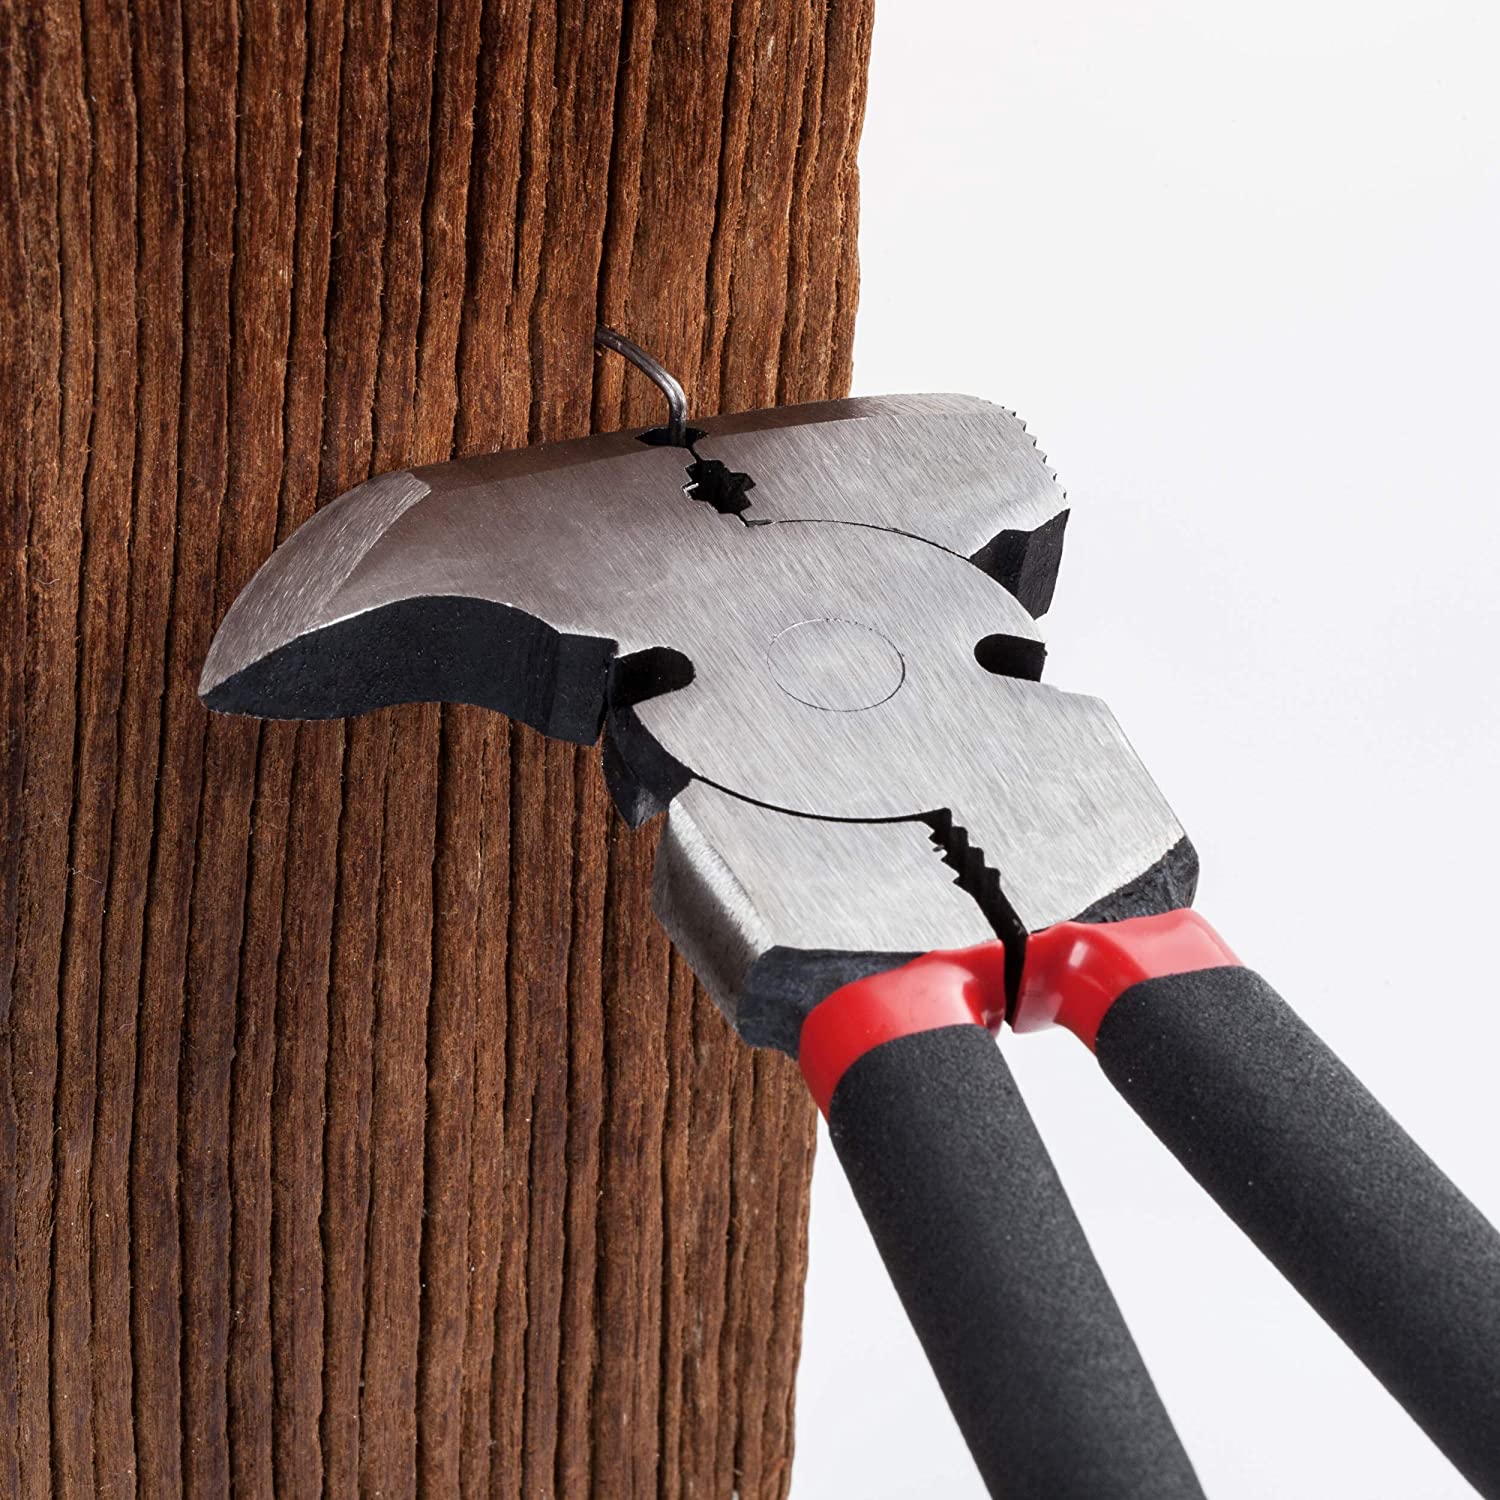
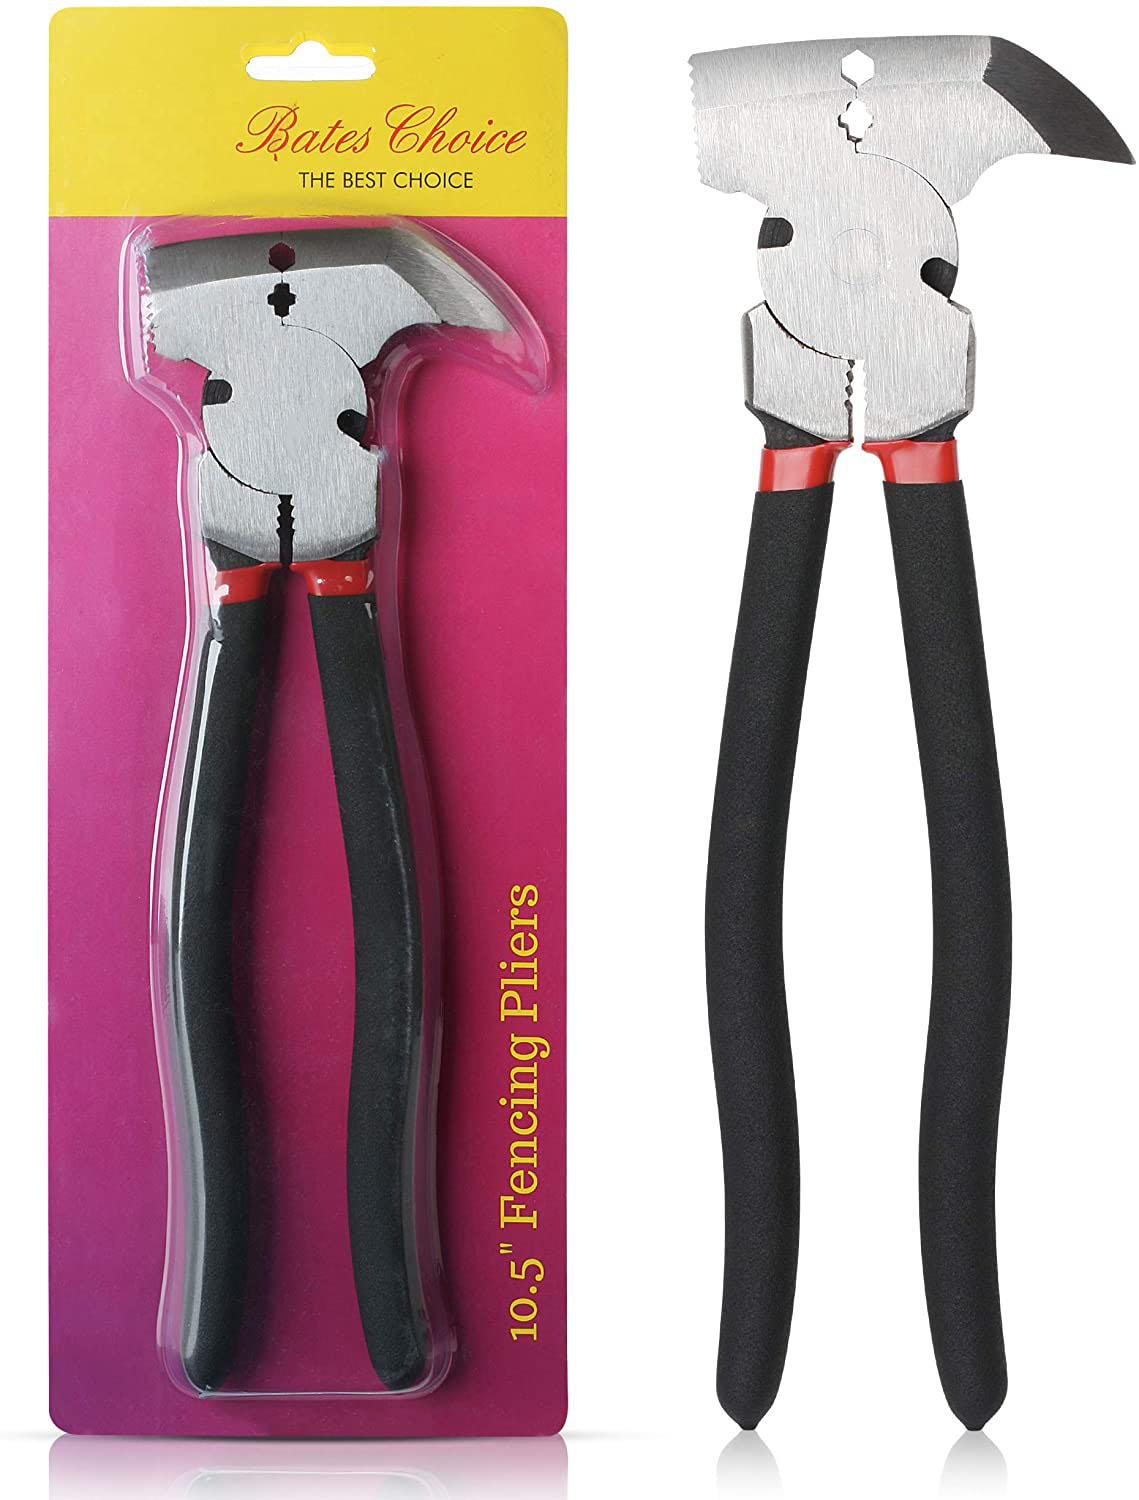
Constructed from durable nickel chromium steel. Machined jaws for maximum gripping strength.
Anti-pinch, non-slip ProTouch Grips provide comfort, control, and less hand fatigue.
This is the only tool you need to work on metal and wood posts.
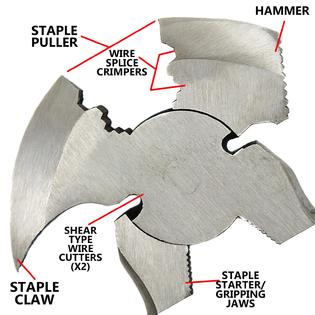
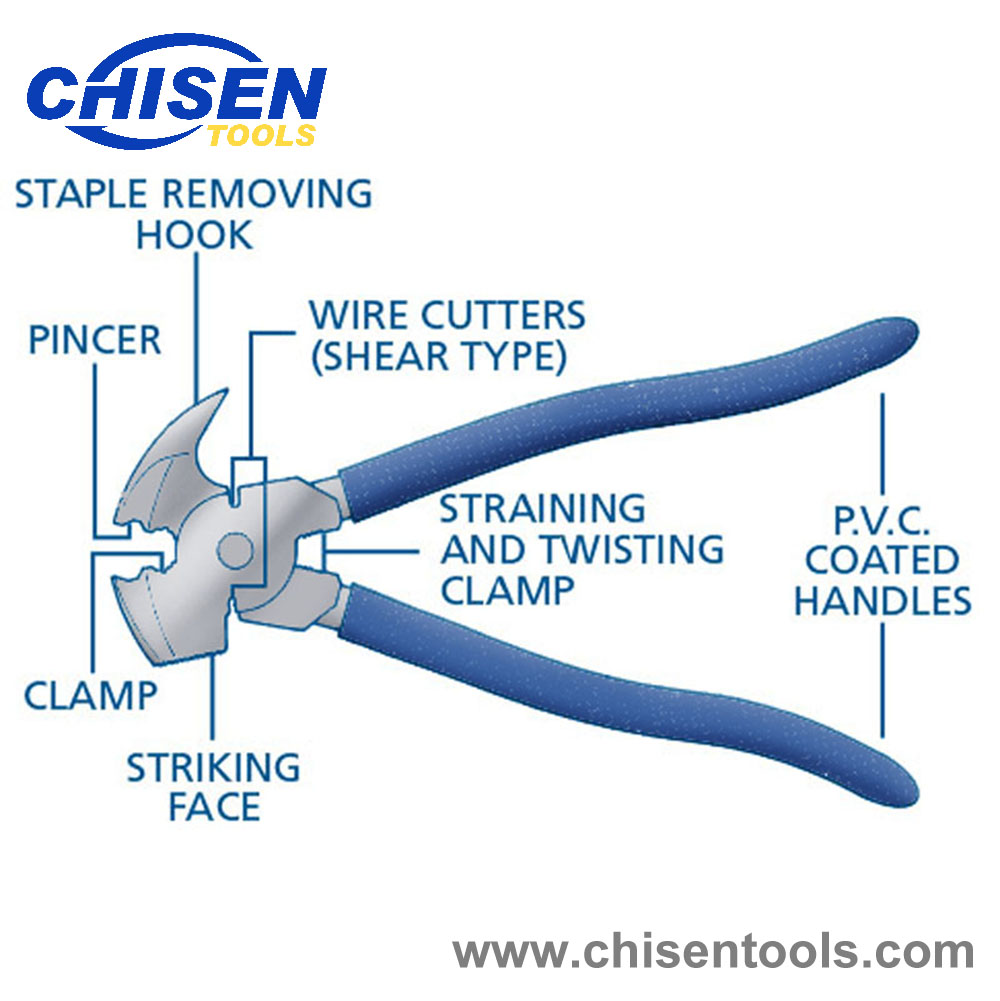
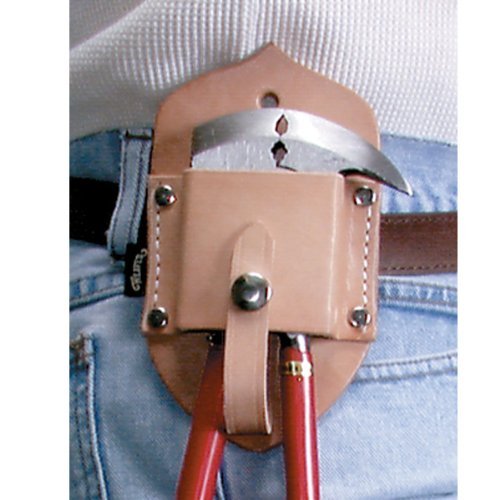
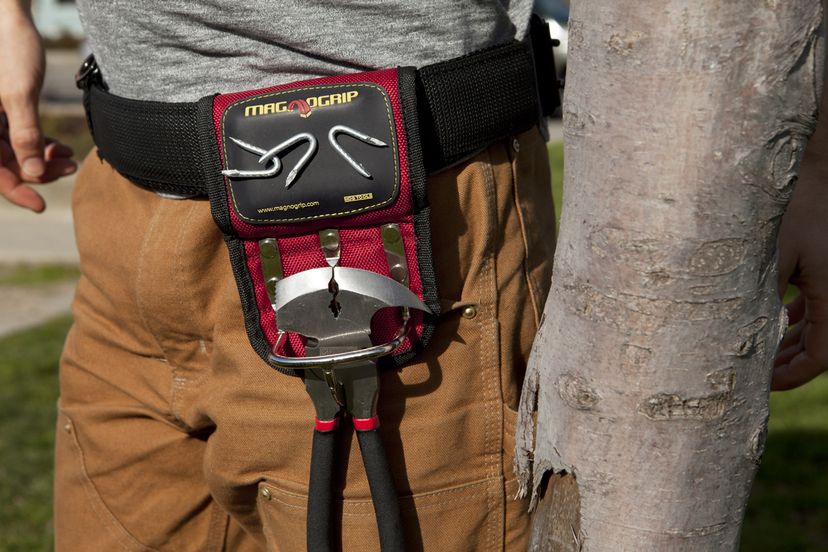

These fence pliers do the job of a wire cutter, wire stretcher, wire splicer, staple starter, staple puller and hammer. Constructed of forge hardened and machine ground steel for durability.
Oil resistant rubberized grip for added comfort.
The utility of a wire cutter, wire stretcher, wire splicer, staple starter, staple puller and hammer.
Great for fence repairs and farm applications.
The Ironton™ Fencing Plier is a handy multi-use tool that is great for fence repairs and many other projects. Made of drop-forged steel with 2-color vinyl grips.
How to Use Fencing Pliers
Fencing pliers or combination pliers perform the duties of many kinds of individual tools that all types of fencing require. A sturdy steel manufacturing process in combination with soft handgrips allows this tool to last for many years in building and maintaining all fence types. This is the only combination tool that can cut, pull, twist, hammer, stretch and crimp fence and fencing supplies in one compact tool that is easy to carry in your pocket.
Fencing pliers help to build barbed wire fences.
Step 1
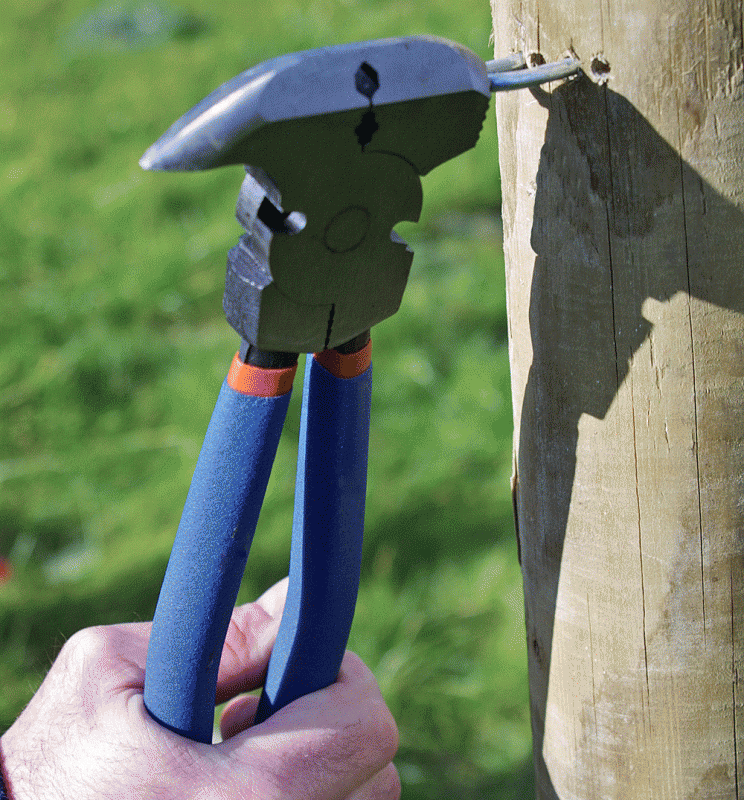
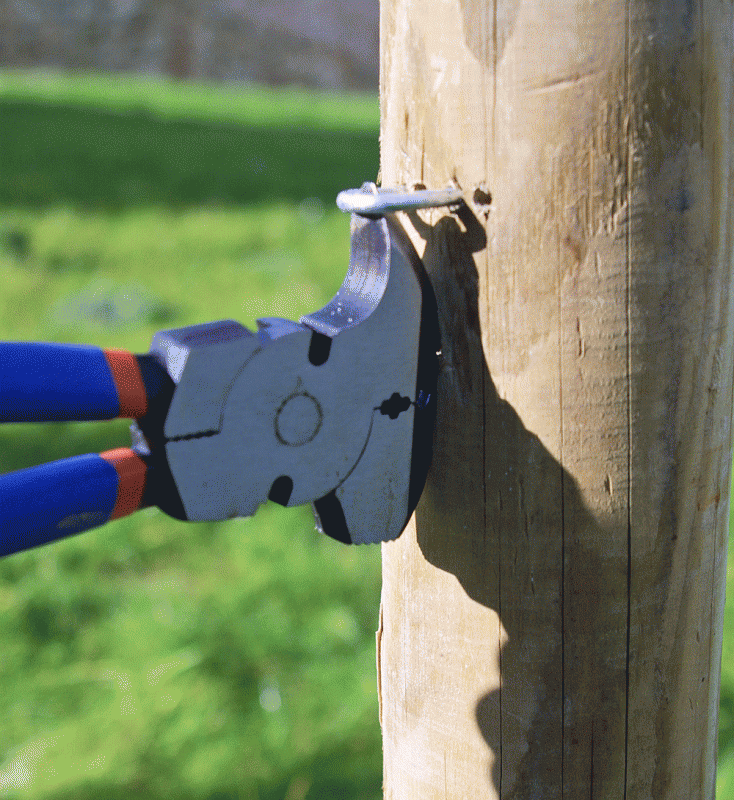
Drive fence staples into a fence made with wooden poles by using the fencing pliers flat head with cross hatches, which involves striking the fence staple with the hammer-like head to drive them into the poles to hold barbed wire, cattle panel, field fence or any other type of fence in place.
Step 2
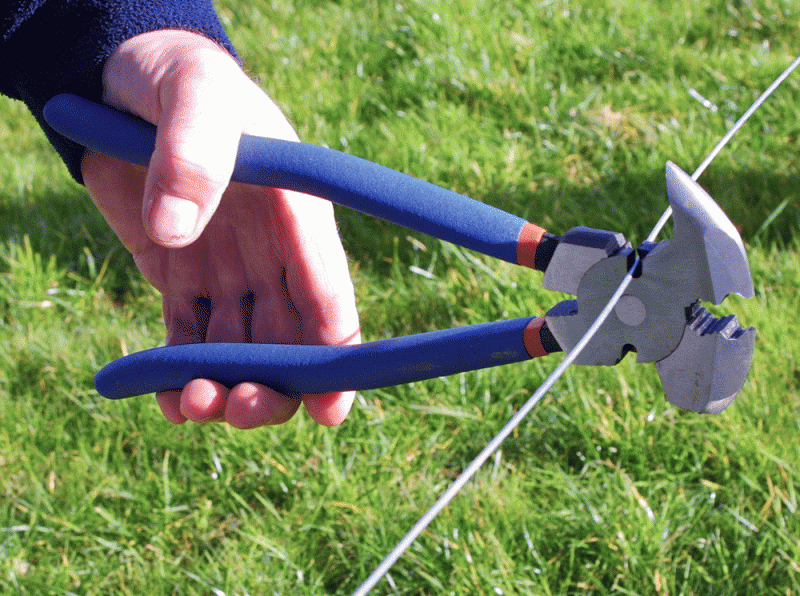
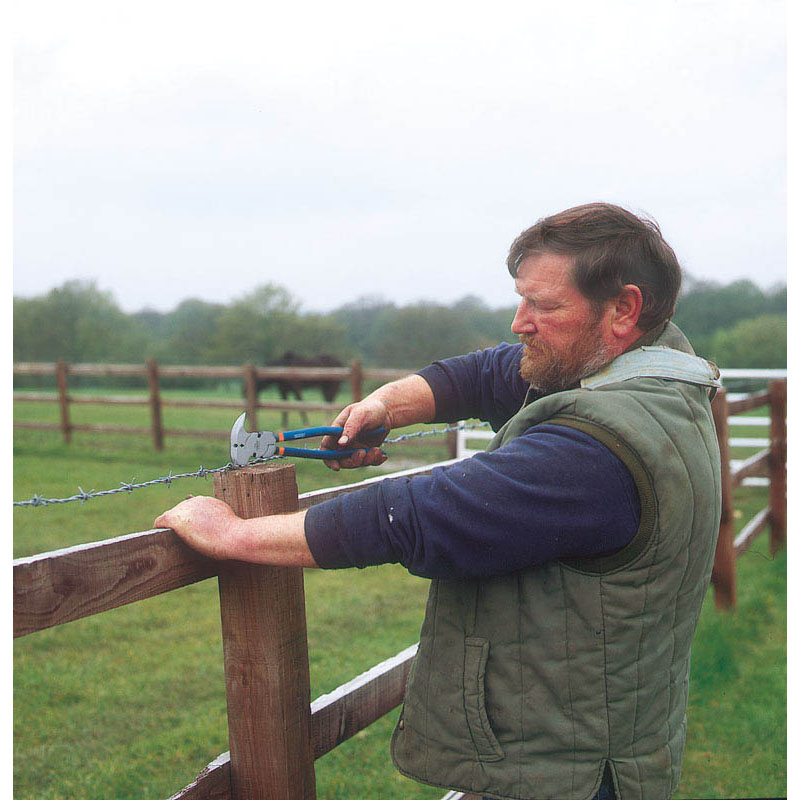
Cut wire with fencing pliers to make a barbed wire or electric wire fence. There is a wire cutter deep inside the jaws of the pliers that will cut from either side. Fencing pliers will also grip wire in the wide teeth on the end of the jaws to twist into loops for attaching spring electric wire gates. Splice wire together to attach pieces for longer lengths of wire.
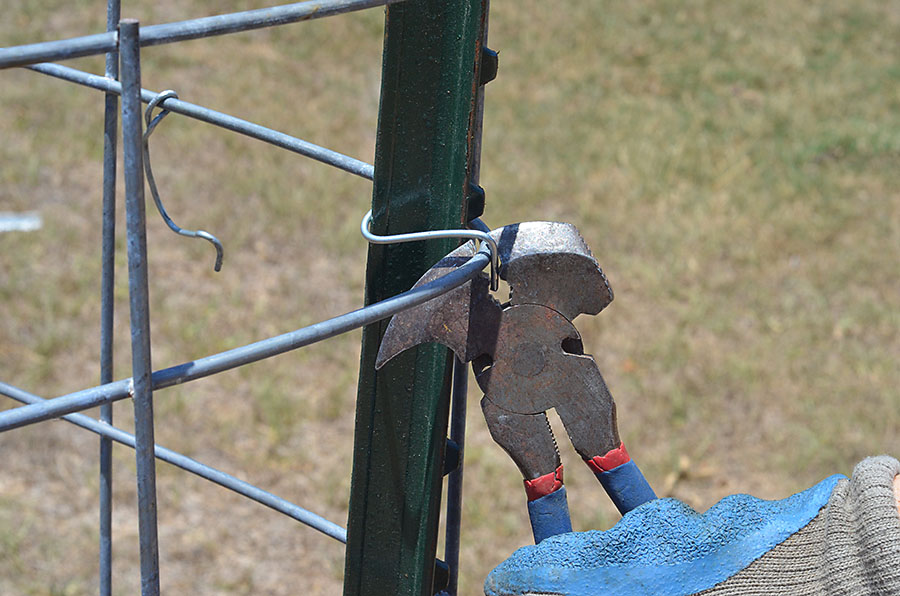
Step 3
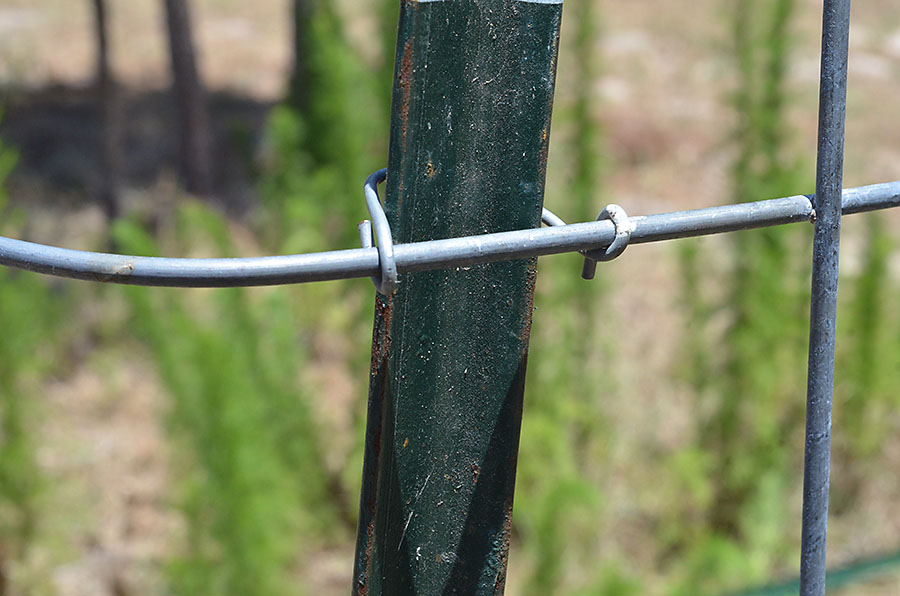
Fasten wire ties with fencing pliers by wrapping around the post and placing each wire tie end around the fencing. The jaws allow squeezing wire tightly to wrap in a circular motion around the fencing to ensure stability.
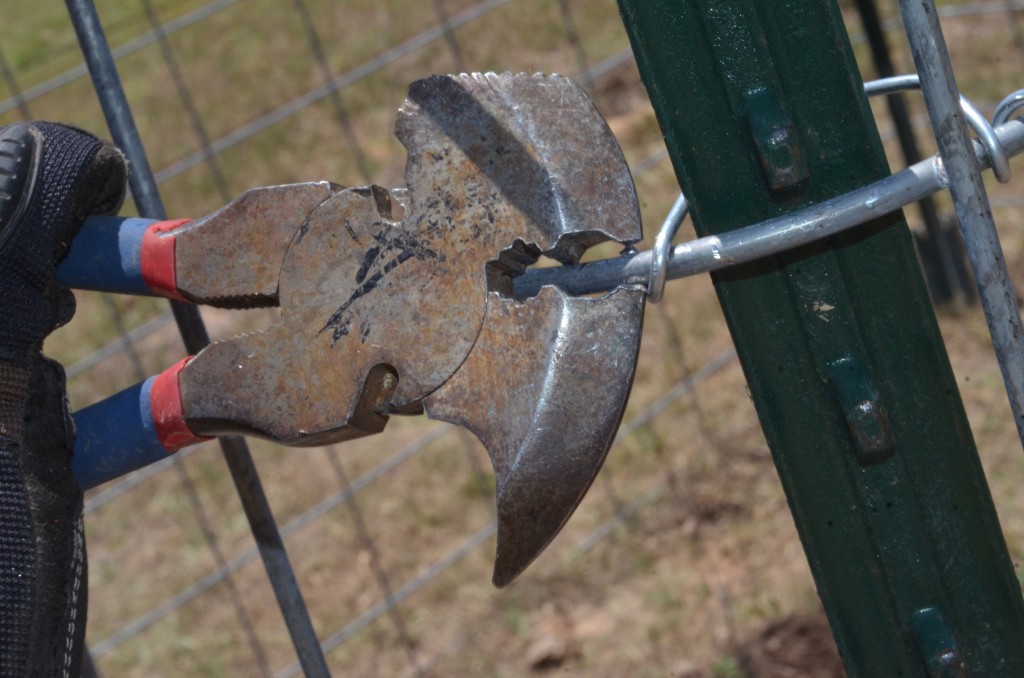
Step 4
Stretch barbed wire by firmly gripping the wire and turning the wire in a twisting motion, which will pull the wire into a loop that you turn in one direction to tighten with each turn. Older fences or fences that have damage from falling trees will loosen and sag. Fencing pliers can tighten all of these areas.
Step 5
Strike nails with the head to drive them into any type of wood with a hammering motion. Protruding nail tips will snip off with the wire cutter deep in the jaws so that the sharp tips do not cause injury to animals or persons.
Step 6
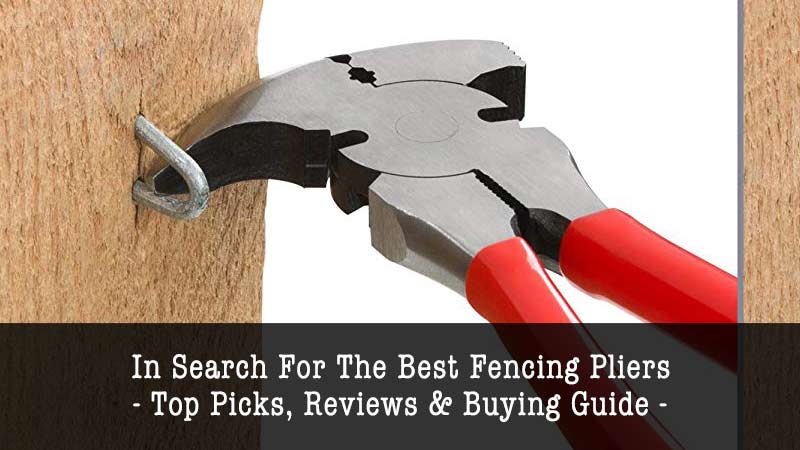
Pull staples by inserting the long curved tip of fencing pliers under the middle of the staple and pulling in an outward motion. Leaning the tool and using the post or wood that the staple is in for leverage helps to pull tightly driven staples. This part of the pliers works as the curved end on a claw hammer.
What Is A Fencing Plier?
We guess, most of our readers are aware of this question anyway. But if it's your first fencing plier, you better be understood the definition of it.
A fencing plier is a hand tool used in fencing, woodworking, gardening, garages, DIYing and so on. With its modified metallic head, it can perform multiple tasks without any extensions or attachments.
With different parts of a fencing plier head, you can do pulling, wire gripping, cutting, holding staples, removing and taking staples off, straight injecting of staples and so on.
4 Ways of Using A Fencing Plier
The way they have combined a small sized hammer and a plier into a fencing plier is really innovative. It gives you a hand with a number of usability’s like-
Wire gripping.
Staple pulling.
Hammering.
Holding staples.
Nailing staples in a straight manner.
And a few more.
We know that you have managed to land on this webpage to learn more about all of these uses, and that’s what we would be talking about as well.
Take a moment, and go through the details discussion on 4 most beneficial uses of a fencing plier-
Knocking The Staples and Nails
When you are working around your garden or garage, you cannot use a nail gun or nailer machine to knock the nails. On top of that, you have to deal with staples sometimes, which is also hard to put through with any machine or by hand.
To rescue, you can use the hammer side of the fencing plier, which might help you to insert into softwood posts. But in the case of hardwood posts, this might not be the best option available.
Cutting and Stripping The Wire
No matter it’s electric repair or DIYing at your projects, you have to deal with wires every now and then. To install a new electric device or to take the old device out, you need to cut, strip or bend wires a lot.
To help with this issue, you don't need to buy a wire cutter. There is a slot that is located on the pivot of the fencing plier. This will give you hand to deal with all those wire cutting and stripping tasks.
To use this slot, you have to open up the slots and adjust the wire into the hole. Once you have done the proper placement of the wire, squeeze the handle and apply firm pressure on the wire. Once done, pull the wire off by pressing the handle gently.
Remember that too much-applied pressure on the wire might cause a cut to it. So make sure that you have the proper pre-assumption of the pressure before pulling the wire off.
Removing Odd Staples
When you are working within carpentry or home-remodeling, it's not only the nice and straight staples that you have to deal with. Sometimes, you need to take the nails and staples off the wall or wooden surface. And that's where another part of this fencing plier would come in helpful.
There is a spike at one side of the fencing plier which will come in helpful in this regard.
The question is, how would the spike help you to take off old staples or nails? Well, here is the process-
The spike should be smartly placed beneath the bent or broken staple. Once you are done with positioning the spike underneath the staple, press a firm pressure on the reverse direction. This will lever the nail up and straighten it up.
Once you see the staple to have enough area to grab with the plier, press it gently on it and take it off.
Another way of removing these kinds of staples is through the pincher of a fencing plier. You might find it in in the middle portion of the head.
How to use the pincher to deal with stubborn staples? Well, grip the staple with the pincher and apply pressure towards the opposite direction of what it's bend at. It should come straight if the pressure is applied properly. Not, grip it with the plier's head and pull it off.
To Prevent Bending while Inserting Nails
Inserting nails into softwood might sound easy. In fact, it's quite easier compared to the same job on the hardwood. In hardwood, if you just keep hammering the nail onto it, there is a good chance that it will bend and the nailing job won't be completed successfully.
In that case, you can use the nailer hole of the fencing plier. Once you have inserted the staple or the nail into the wooden surface by a bit, you can hold it through the nailer hole and keep hammering until the staple is well into the subject.
In this way, the nail or staple will be inserted in a straight manner. And that’s what you’re looking for, right?
How To Ensure Best Uses of A Fencing Plier?
So far, we have gone through various uses of a fencing plier. But can you make all those uses with the comfort with just any fencing plier in the market?
That's a big no-no. You can't expect a good usability from just any random model in the market. Therefore, we will list some tips through which you can ensure the best quality and best use of a fencing plier.
Have a look
Make Sure that It’s Comfortable to Work with.
If you can't hold the handle of the plier with comfort, you can never bring out the best output from it. So, we've put the essence of having a comfortable handle on top of every item on the list.
Make sure that your fencing plier comes with a comfortable, thick rubber grip. If there is none, you can be wrapping it with one.
Make Sure that Your Plier is Multi-Tasking
As you have seen throughout the post, fencing pliers can do a lot of different tasks. But each of these tasks is concerned with one or another part of the fencing plier itself.
Make a list of tasks that you would like to do with your fencing plier. And then, understand what kind of physical extension the plier needs to execute that task with it. And before buying, check for each of these physical extensions in the fencing plier.
Make Sure That The Metal Part Doesn’t Get Rusted
Rust is the biggest foe of anything metallic. And when it's about something like a fencing plier, rust can literally ruin the whole tool. As a rusted pliers head won't be serving you with any of these features. Also, there will be jamming issues.
To make sure that your plier doesn't get attacked by rust, the first advice is to not let it get in touch with water or moisture. In case there is hardly any escape from moisture, you can try putting some grease on top of it. This layer will prevent a direct contact between the metal part and the moisture of the air.
Make Sure It’s Okay with Your Palm
If you have a closer look at the handles of a fencing plier, you should notice that they are a bit closer to each other compared to the traditional pliers.
The reason is, you have to squeeze them for pressing purpose, and you need to grab them together for using it as a hammer. So, make sure that you are okay with the distance and design of the handles of the pliers. Otherwise, you will have issues with the cutting, pulling, splicing, etc.
Attaching T-post Clips with Fencing Pliers and The Clip Bender
When you’re installing a T-post fence, you’ll see a variety of tools to help with the install. You’ll need a T-post hammer, a spool unroller handle thing, a wire stretcher and fencing pliers. These are essential. You can also get The Clip Bender, but I don’t know if it’s essential. I’ll show you what it does and you can decide how tight you need your clips to be. It helped us maintain tension through our zig-zag fence on hostile ledge areas, but if you had straight runs through a field, your wire stretcher might be able to hold tension from a corner brace the whole time.
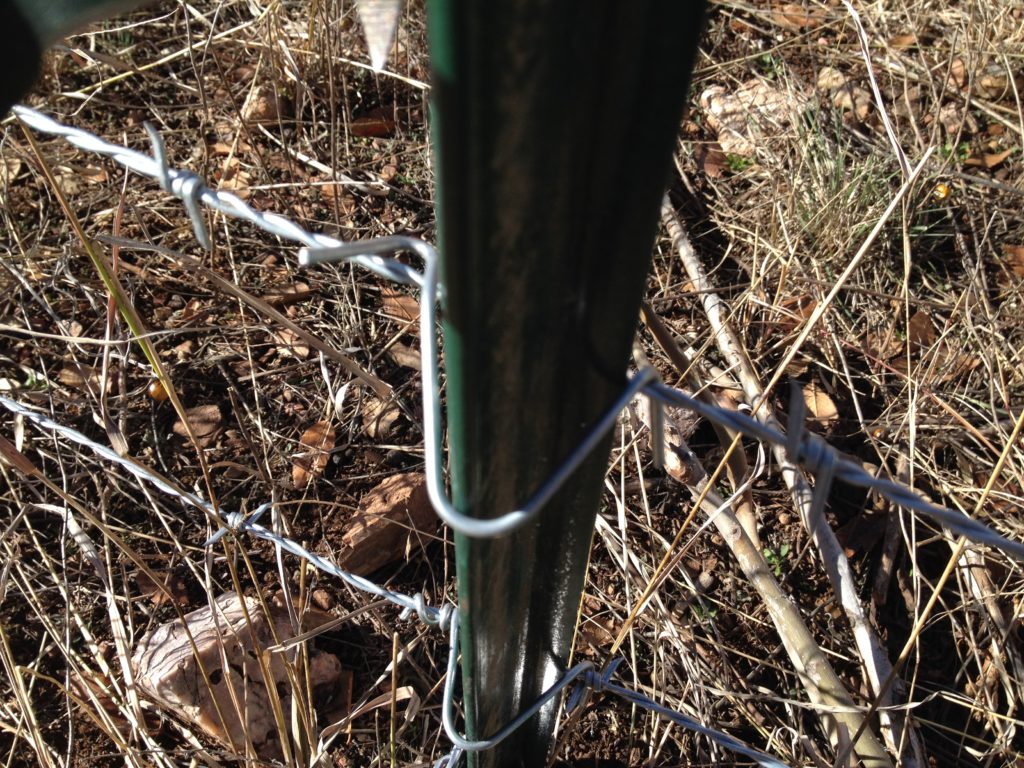
First, with your wire tensioned against the T-post, put the clip on like so.
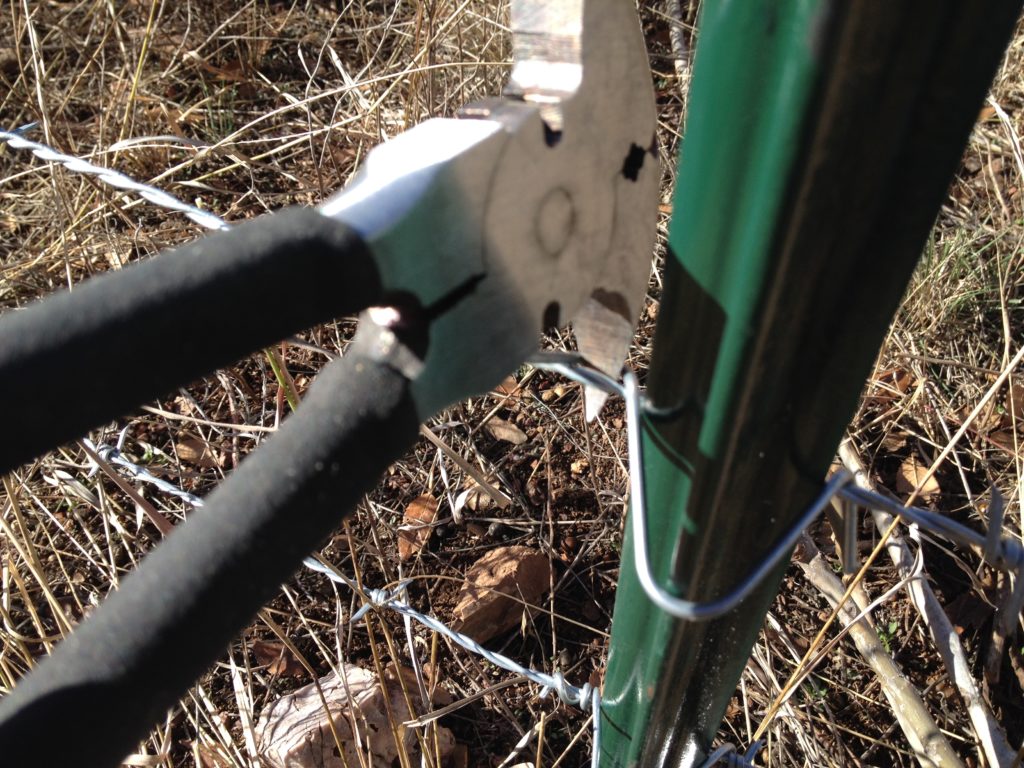
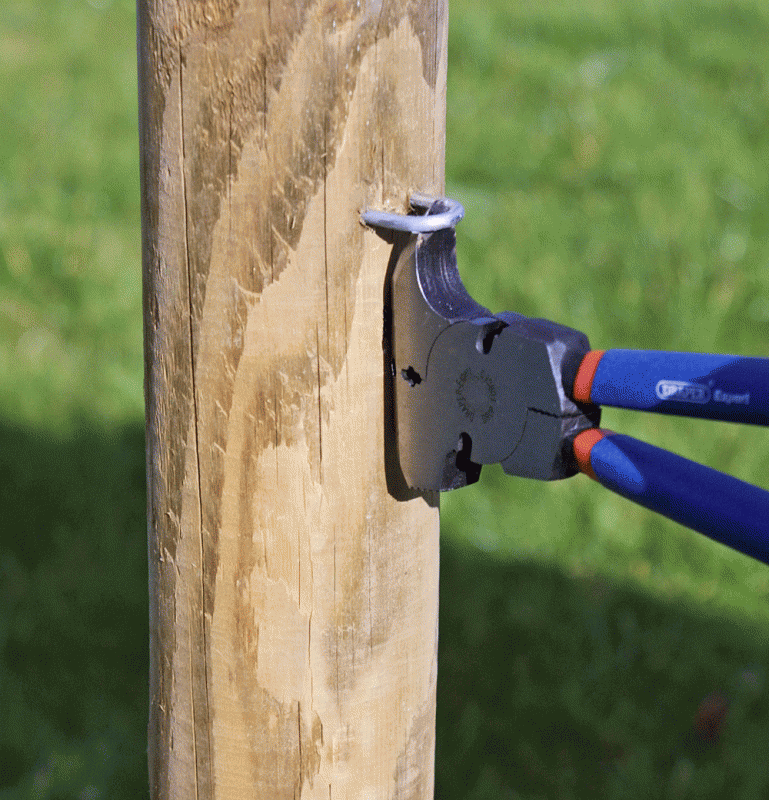
Next use your fencing pliers to stab through the hole. [The Clip Bender can also do this, but the fencing pliers work better imo; its wedge shape results in a tighter, more consistent hooking of the clip].
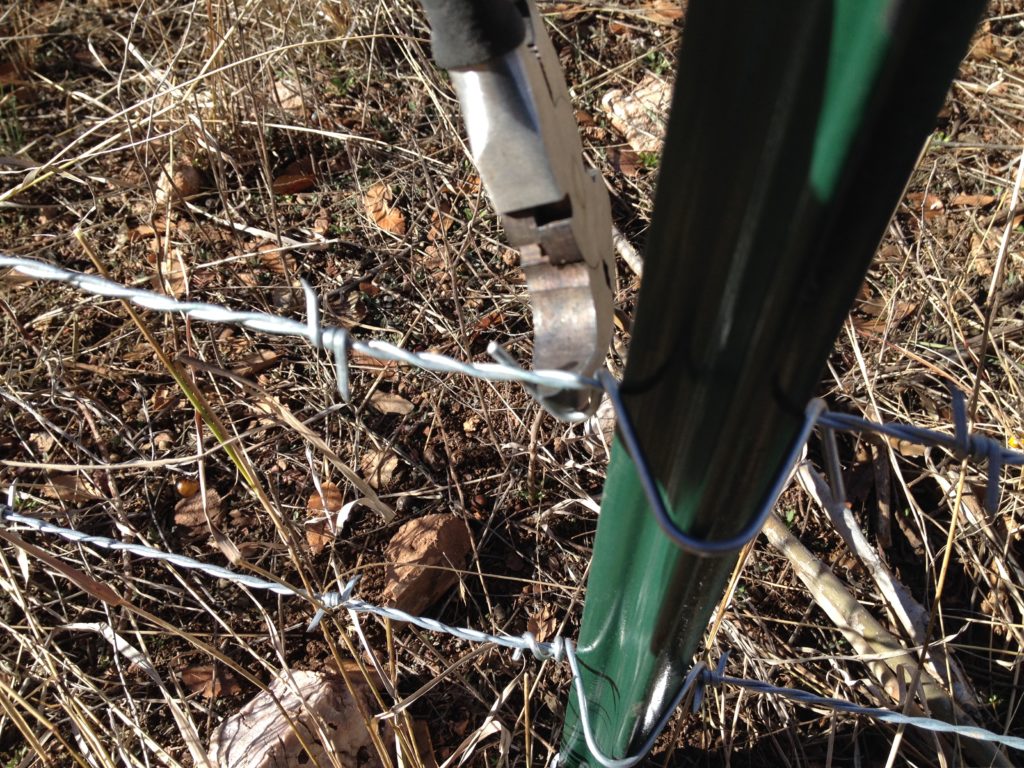
Rotate the fencing pliers to bend the clip.
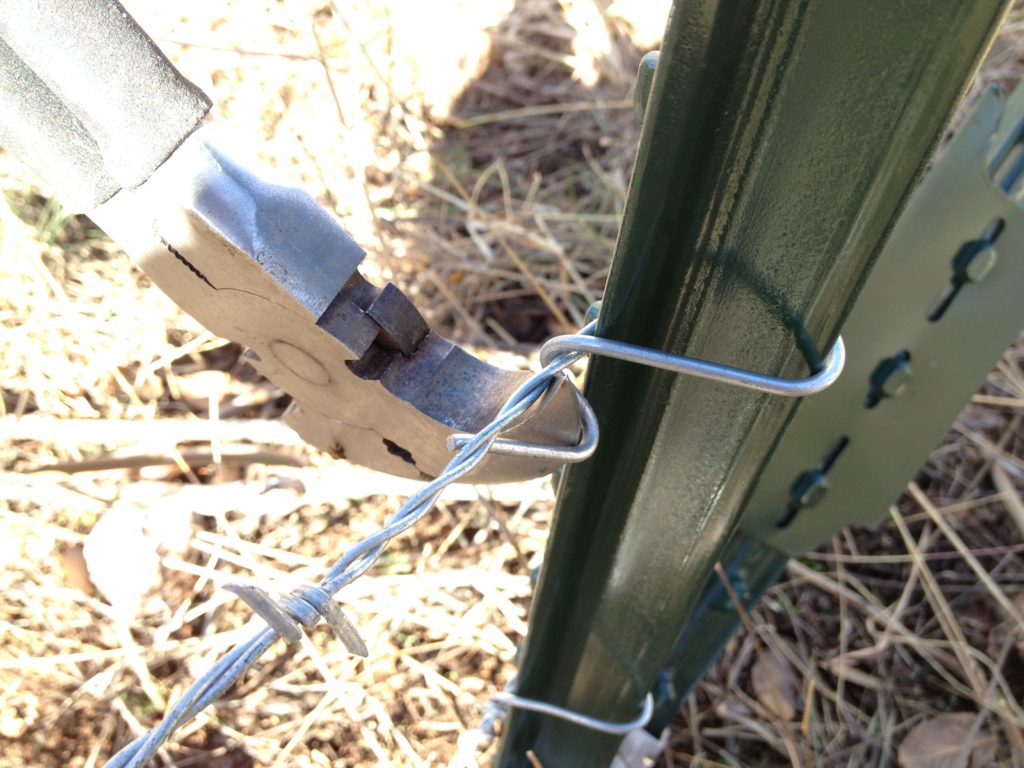
nd somewhere around here - or keep going - up to you.
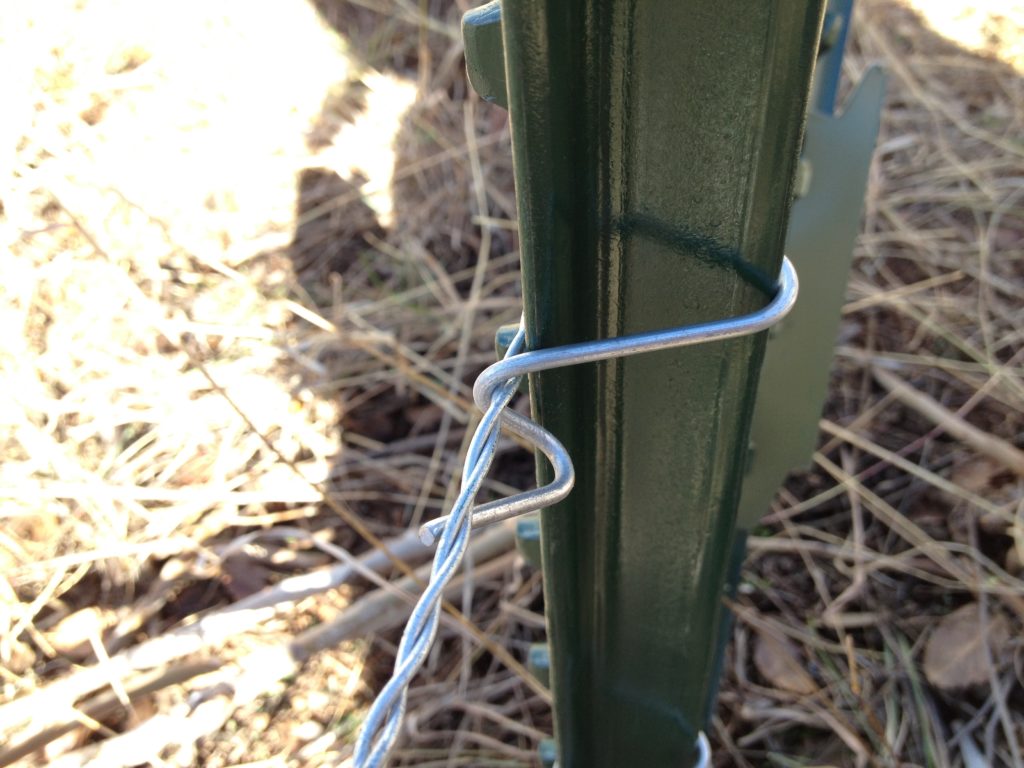
This might be called attached; good enough. But since we have The Clip Bender, we continue.
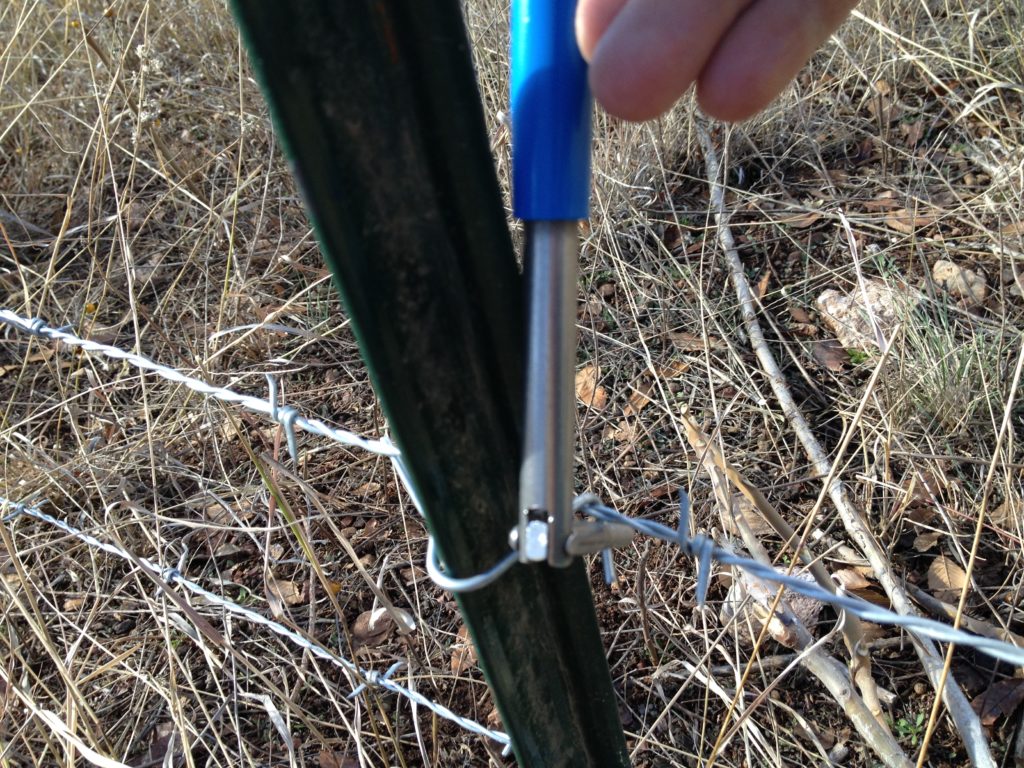
Put the other side of the clip through the hole in The Clip Bender.
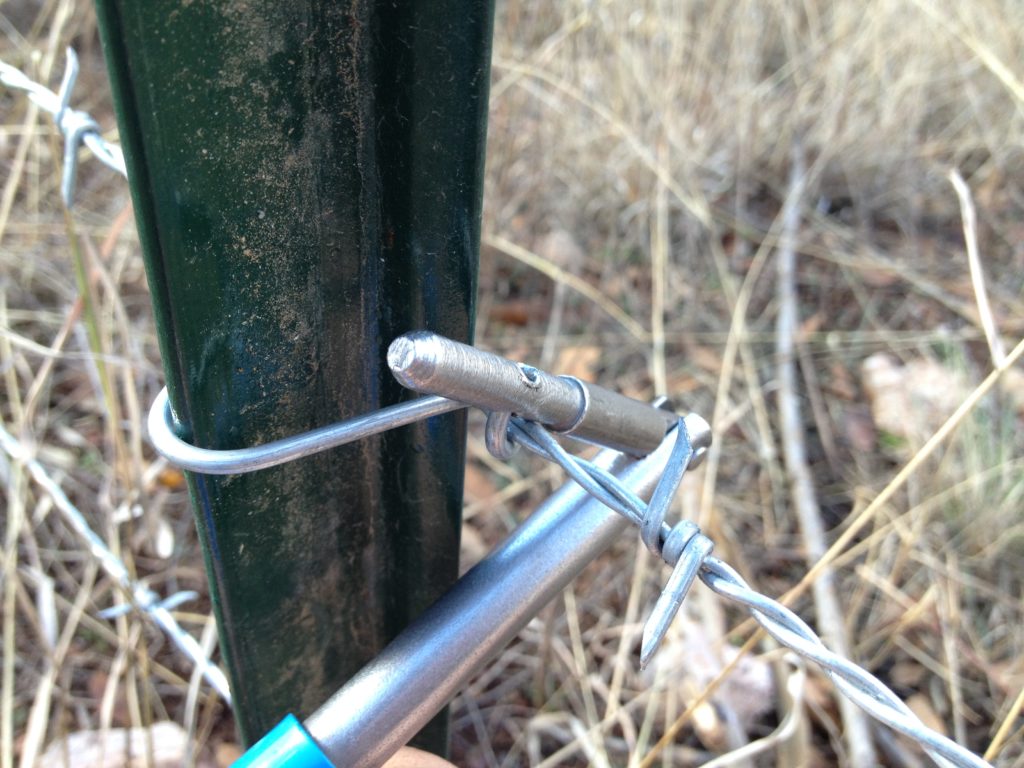
Spin the Clip Bender around the fence wire.
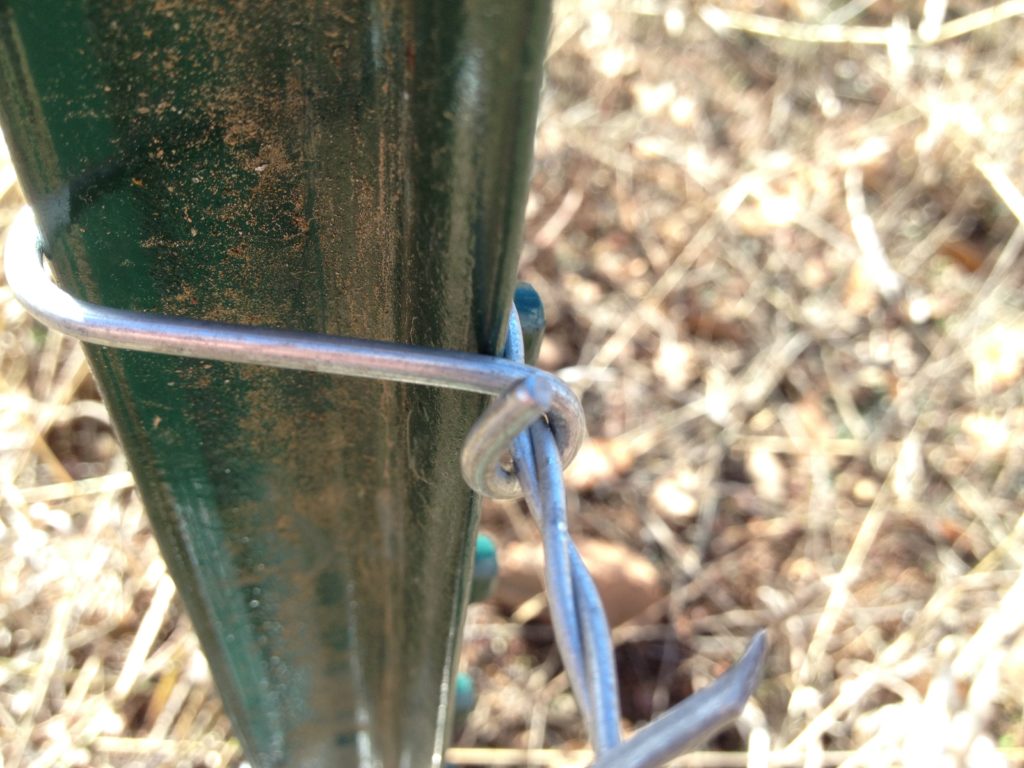
Here’s what you get. Nice and tight.
If you encounter a situation where the wire stretcher won’t be able to maintain your tension, you can spend extra time tightening the hell out of the clip on the last tensioned section. The Clip Bender is good for this. See below:
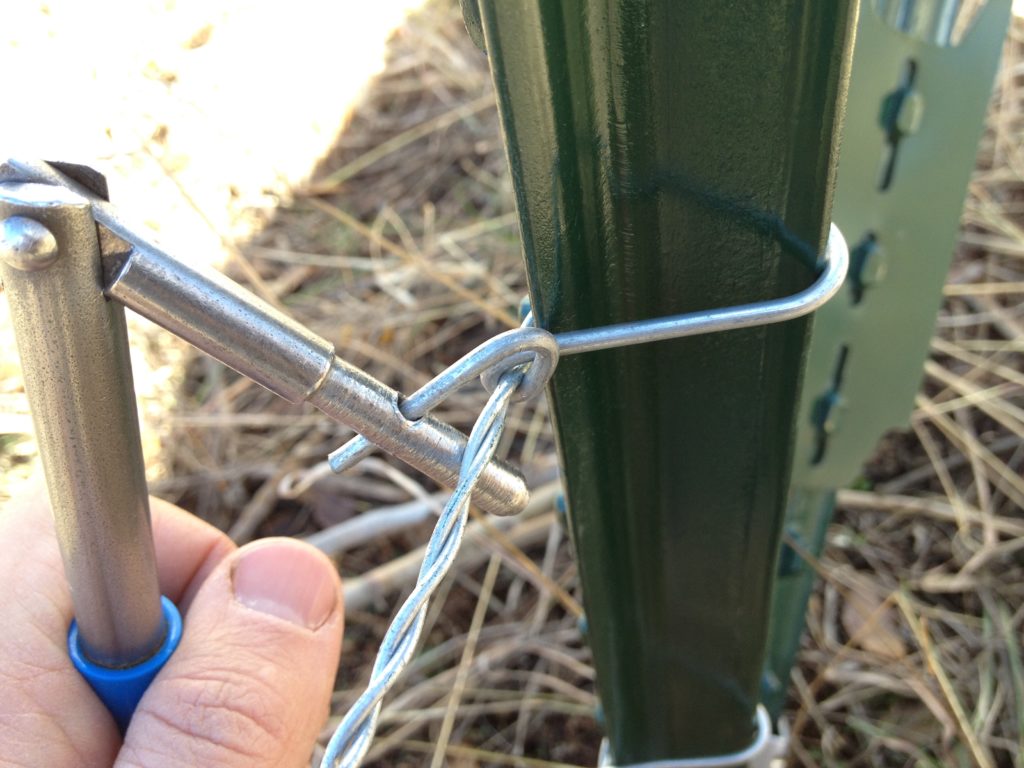
Stab through the hole of the already attached clip.
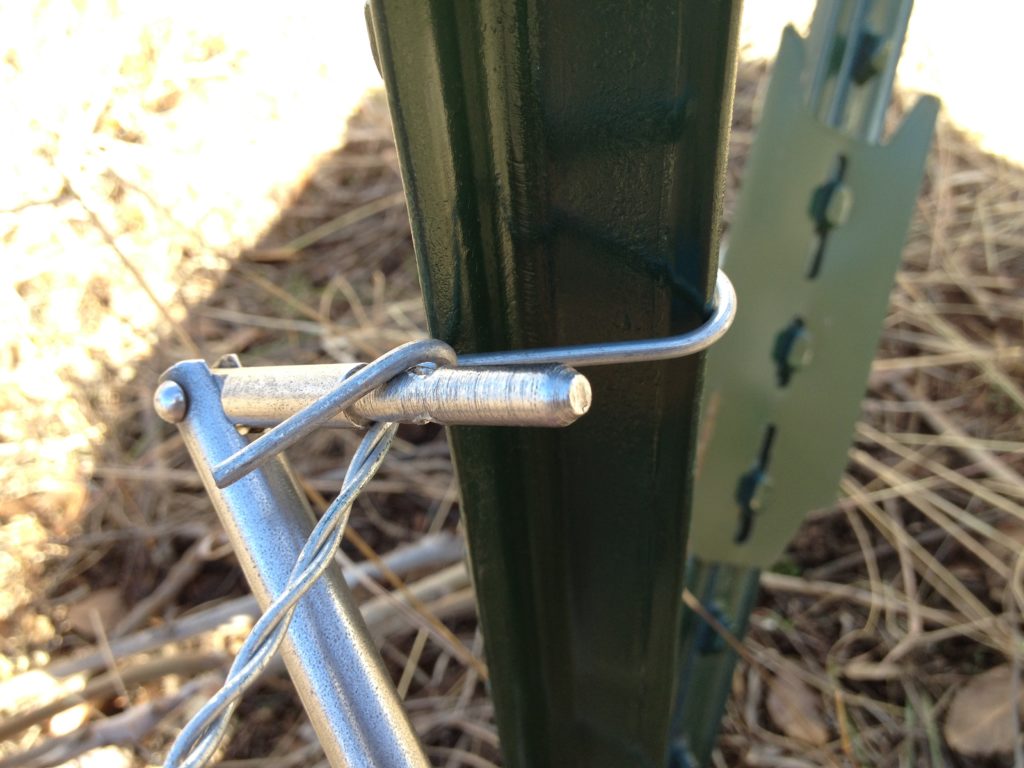
Rotate The Clip Bender.
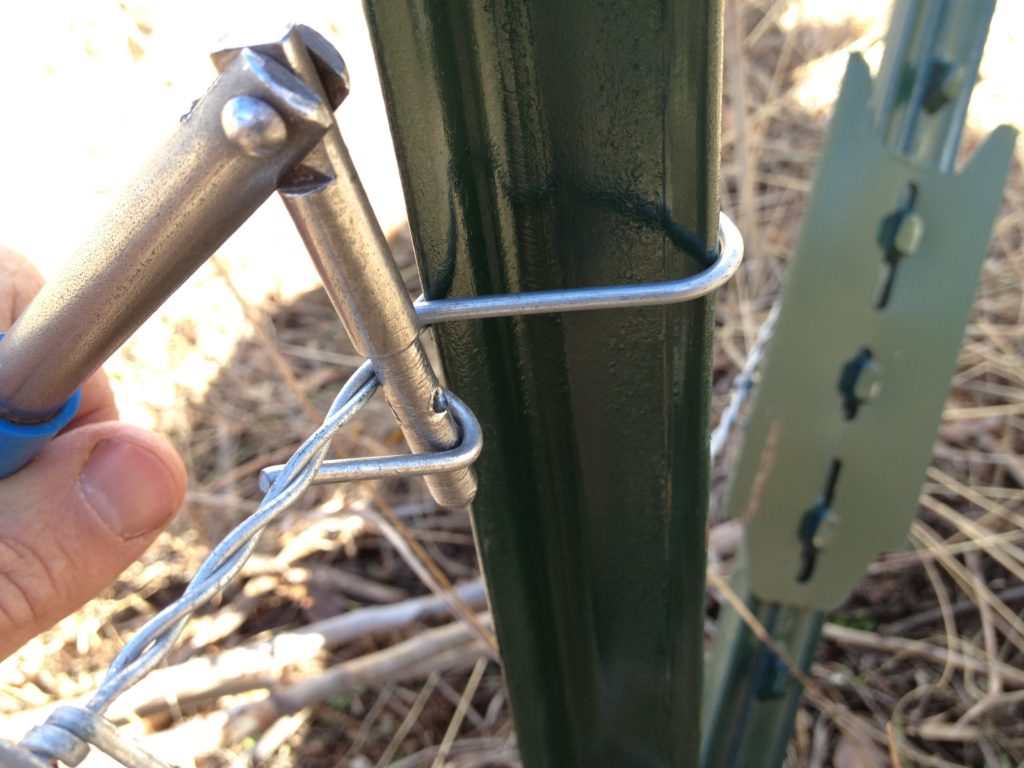
Put the end through the hole and rotate some more.

This is hopefully what you end up with. Super tight coil. Tension preserved. It can be done without The Clip Bender using a Linesmans’ Pliers, say, but The Clip Bender is much easier.
- Combination Pliers
- Long Nose Pliers
- Diagonal Cutting Pliers
- Bent Nose Pliers
- Round Nose Pliers
- End Cutting Pliers
- Wire Stripper
- Mini Pliers
- Circlip Pliers
- Slip Joint Pliers
- Groove Joint Pliers
- Tower Pincers
- Locking Grip Pliers
- Fishing Pliers
- Wood Chisel
- Adjustable Wrench
- Combination Spanner
- Double Open End Spanner
- Double Offset Ring Spanner
- Hammer
- Axe
- Screwdriver
- Bit
- Bolt Cutter
- Pipe Wrench
- Aviation Snip
- Tin Snip
- Pruning Shear
- Pipe Cutter
- Cable Cutter
- Glass Cutter
- Hair Scissors
- Pet Scissors
- Kitchen Scissors
- Utility Knife
- Electrician Knife
- Saw
- New Universal Socket Wrench
- F Clamp for Wood Working
- Wood Turning Lathe
