Light Duty Staple Gun
Chinese profesional manufacturer of light duty staple gun
| Item No.: | CS121102 |
| Product Name: | Light Duty Staple Gun |
| Material: | Carbon Steel |
| Surface Finishing: | Paint Coating |
| Size: | 4~14mm |
| Packaging: | Double Blister, 6pcs/Inner Box, 24pcs/Carton |
| HS Code: | 84671900 |
Detailed Description:
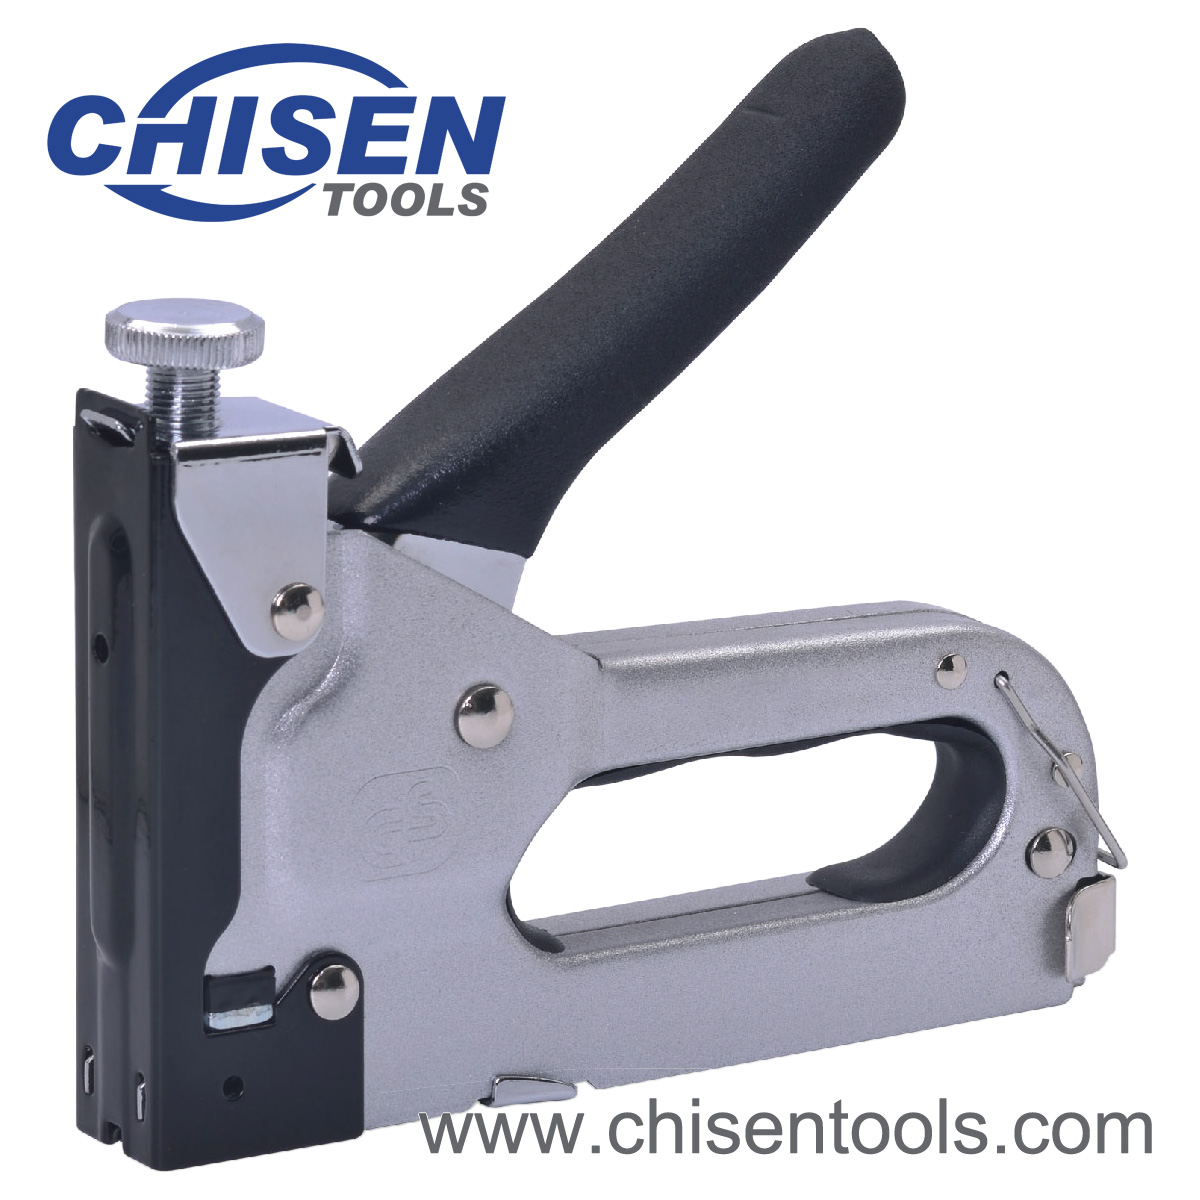
Staple Gun's Features
- Durable steel construction;
- Power adjustor;
- Anti-slip color under-grip;
- Built-in staple remover at rear;
- Rear loading system;
- Safety handle lock.
| Rivet Material | ||||
| Type | Wire | Crown | Leg Length | Compatible Staples |
 |
0.7mm | 10.6mm/ 11.3mm |
4-14mm | Arrow JT21 Rapid 53 1004-1014 |
How to Use Staple Gun
 Have you ever needed to attach something firmly, but couldn’t find a reliable way to do so? Whether you’re working on a DIY project or just need a quick fix around the house, a staple gun can be incredibly useful. However, if you’ve never used one before, it can be a bit intimidating. Don’t worry, though – with a few simple steps, you can learn how to use a staple gun like a pro.
Think of a staple gun as your personal assistant for all those household tasks you’ve been putting off. From attaching upholstery to fixing a broken fence, a staple gun can make your life a whole lot easier. But where do you start? First, make sure you have the right staple gun for the job.
Next, load your staples and adjust the depth and pressure settings to ensure a successful staple every time. Finally, keep safety in mind – always wear protective gear and be mindful of where you’re pointing the gun. Whether you’re a beginner or an experienced DIYer, a staple gun is a must-have tool in your arsenal.
So why wait? Get started today and join the millions of people who have already discovered the joys of staple gun usage.
Step 1: Load the Staples
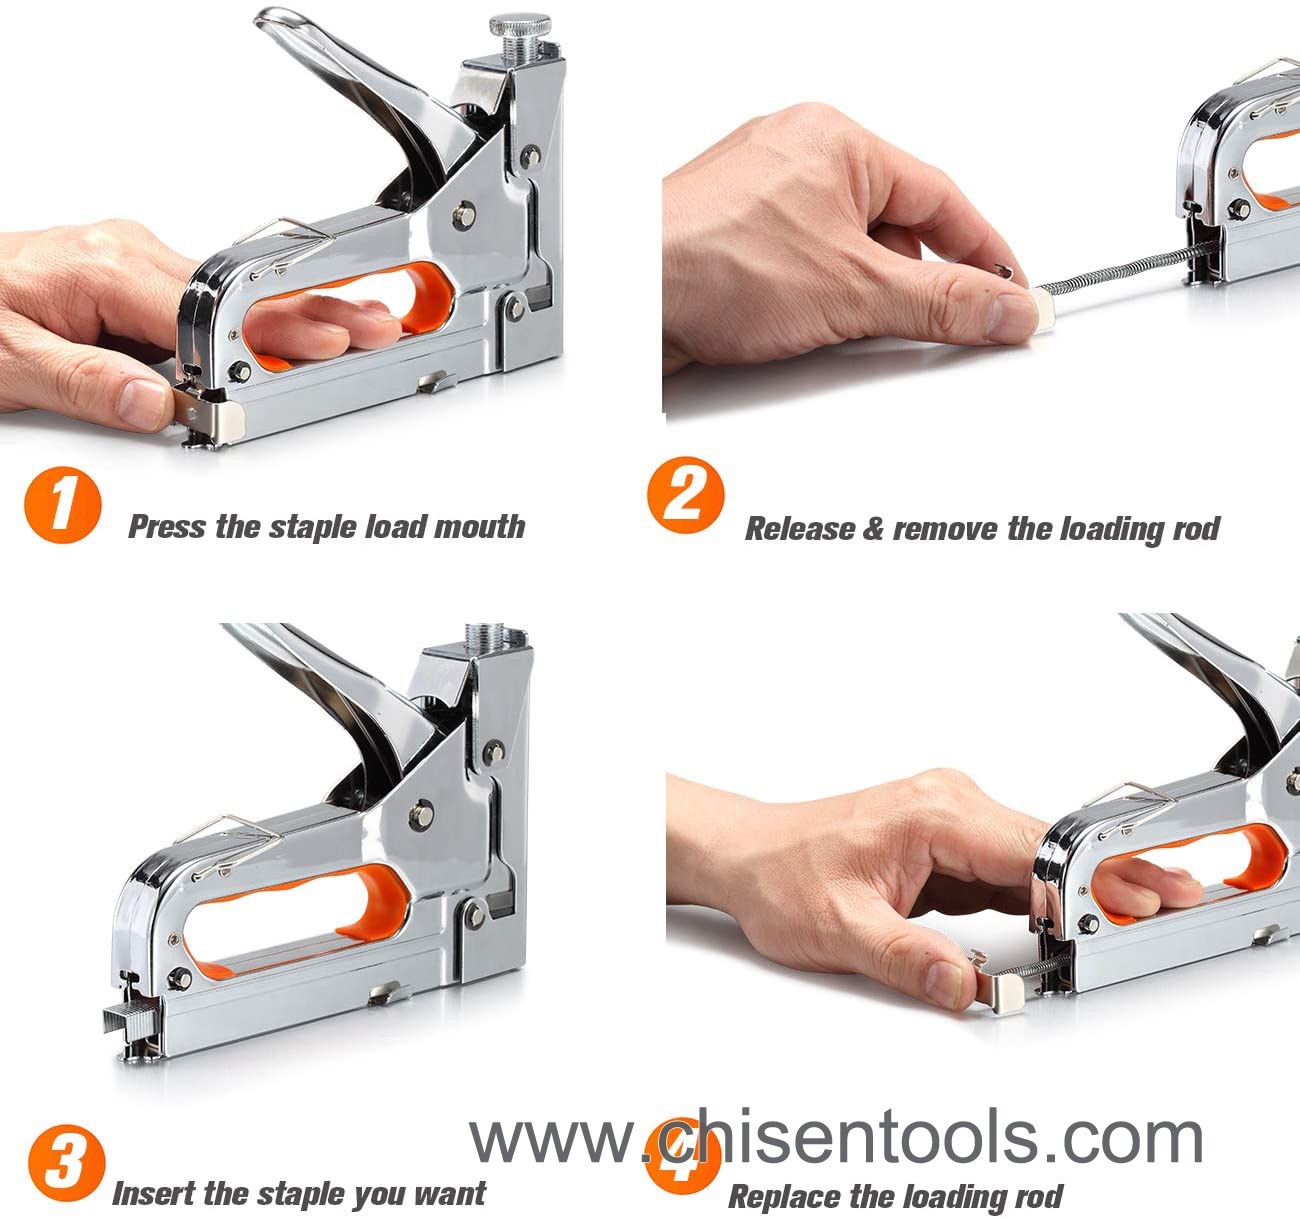
If you’ve never used a staple gun before, the process might seem a bit daunting at first. But don’t worry, it’s actually quite simple! The very first step is to load the staples into the gun. This can vary from model to model, so be sure to consult your manual.In general, you’ll need to locate the area where the staples are inserted, usually at the end of the gun. Then, press the release button or lever, which will open the chamber. Next, insert a strip of staples, making sure that they are properly aligned and facing the right direction.
Finally, close the chamber and you’re ready to go! It’s important to note that safety is always a top priority when using a staple gun, so be sure to follow all instructions carefully and wear appropriate protective gear. With your staples loaded and your gun at the ready, you’re now one step closer to completing your next DIY project!
Make sure your staple gun is not loaded before trying to put in a new strip of staples.
When it comes to using a staple gun, it’s important to first ensure that it’s not loaded before attempting to insert a new strip of staples. This might seem like an obvious step, but it’s one that can easily be overlooked in the rush to get things done quickly. Failing to properly check your staple gun could result in accidental discharge, causing injury or damage to surrounding objects.
So, always take the time to double-check that your staple gun is unloaded before proceeding with the next step. Trust us, a little extra caution can go a long way in preventing accidents and making your staple gun usage experience much more smooth and hassle-free.
It’s important to choose the correct size and type of staple for your project.
When it comes to using a stapler, choosing the correct size and type of staple for your project is crucial. The first step in using a stapler is to load the staples. Depending on the type of stapler you have, the loading process may vary.
For some staplers, you may need to remove the cap on the back of the stapler to access the staple tray. Once you have accessed the staple tray, you can load your staples. It’s important to ensure that the staples are facing the correct way, as this will affect their ability to penetrate the paper or material you are using.
The main keyword to keep in mind when loading your staples is compatibility. Make sure the staples you are using are compatible with the type of stapler you have. Using staples that are too large or too small can result in a stapler jam or uneven staples.
By taking the time to properly load your staples and ensure compatibility, you can avoid frustration and ensure a successful outcome for your project.
Step 2: Position the Gun
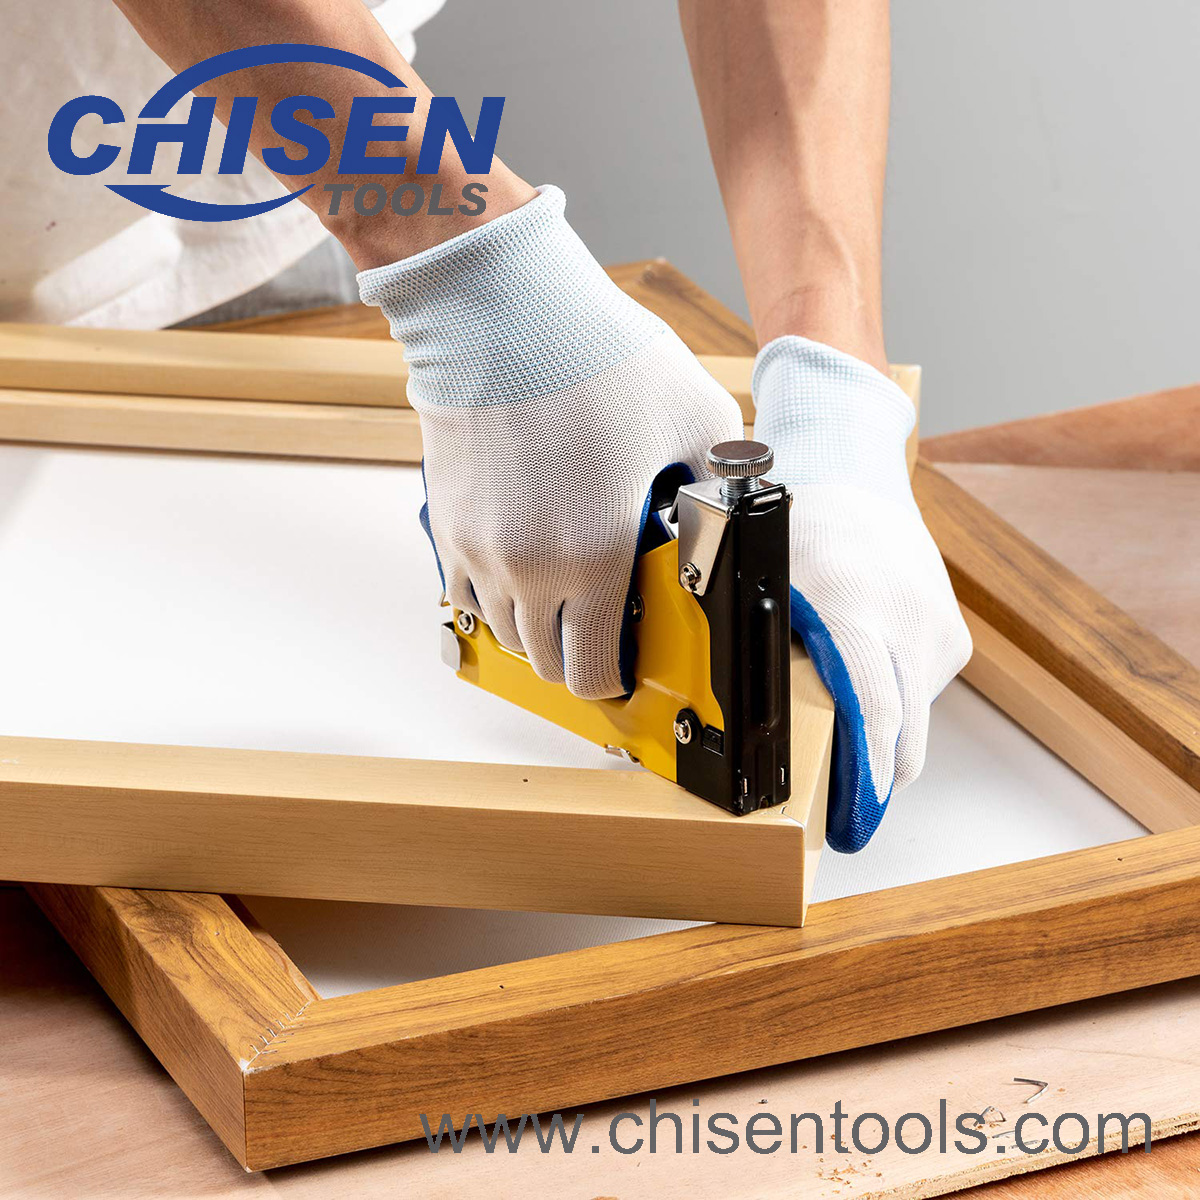
When it comes to using a staple gun, positioning the gun correctly is essential for safety and accuracy. To start, make sure the gun is loaded with the correct staples of the appropriate size for your project. Holding the gun firmly, position it against the surface where you want to staple.It’s important to make sure that the gun is perpendicular to the surface, as this will affect the angle and depth of the staple. Once you have the gun in the correct position, press the trigger to release the staple into the surface. Be sure to keep your fingers away from the stapling area to avoid injury. With some practice, you’ll quickly become comfortable with positioning the gun correctly and producing consistent, well-placed staples. Remember to always wear safety glasses and read the manufacturer’s instructions carefully before using a staple gun. With these precautions in mind and using the right techniques, you can complete your stapling projects with ease.
Hold the staple gun firmly with one hand and make sure the staple exit point is facing the surface you want to attach the staples to.
When it comes to using a staple gun, positioning is crucial. The second step in this process involves holding the staple gun firmly with one hand and making sure the staple exit point is facing the surface you want to attach the staples to. This may seem like a no-brainer, but it’s essential to ensure that the staples go where you want them to and hold the materials together as needed.
Think of it like aiming a hose when you’re watering plants. You want to make sure you’re hitting the right spot so that the water gets to the roots and helps the plant grow. Similarly, positioning the staple gun correctly ensures that the staple gets to the right spot and holds the materials tightly together.
Also, keep in mind the type of surface you’re attaching the staples to. If it’s a hard surface, you may need to apply more pressure or use a heavier-duty staple gun. On the other hand, if the surface is soft, you may want to use a lighter-duty staple gun and apply less pressure to prevent damage to the materials.
While it may take some practice to get the positioning just right, it’s worth the effort. With the right positioning, you can ensure that your staples are doing their job and keeping your materials securely in place. So, take your time, aim carefully, and get ready to staple like a pro!
Step 3: Squeeze the Trigger
After properly loading your staple gun and aligning your materials, it’s time to finally squeeze the trigger and fire the staples. But how do you use a staple gun’s trigger? It’s simple, really. Firmly grip the handle of the staple gun with one hand and use your other hand to press down on the trigger. Depending on the type of staple gun you’re using, you may need to also apply pressure with your palm against the top of the stapler. As you squeeze the trigger, the staples will be driven into your materials. However, be careful not to overuse the trigger, as this can lead to jamming or damaged materials. With proper care and attention, using a staple gun’s trigger can be a breeze, helping you quickly and efficiently get your projects done.Squeeze the trigger handle firmly to release a staple. Release the trigger handle to reset the gun.
Once you have positioned your staple gun in place, it’s time for the next step: squeezing the trigger handle. This is where the magic happens! Squeezing the trigger handle firmly is essential to release a staple. You’ll want to make sure you have a good hold on the gun and that your fingers have a secure grip on the trigger handle.
Just a gentle squeeze won’t do the trick – make sure you apply enough pressure to release the staple. Once you hear the satisfying thud of the staple being fired, release the trigger handle to reset the gun. This step is crucial in making sure you’re ready for the next staple.
It’s important to remember to always keep a good grip on the gun and make sure you’re applying enough pressure to get the job done right. With a little practice, you’ll be a pro in no time! So go out there and show everyone what you can do with your staple gun.
Keep your fingers away from the trigger when loading new staples.
As you’re loading new staples into your stapler, it’s important to keep your fingers away from the trigger. This may seem obvious, but accidents can happen when you’re not paying attention. When you’re ready to squeeze the trigger, make sure you have a good grip on the stapler, and keep your fingers well clear of the firing mechanism.
The last thing you want is a staple puncturing your skin, or worse, injuring somebody else. So, take a moment to make sure you’re holding the stapler correctly, with two hands if necessary, and keep your fingers well away from that trigger until you’re ready to use it. By doing so, you can prevent any accidents or mishaps from happening and ensure that you have a successful and safe stapling experience.
Remember, safety always comes first!
Step 4: Repeat
So you’ve successfully used your staple gun to finish your current project, what’s next? Step 4 is simple–repeat! If you have more items that need stapling, continue to use the same technique and precautions as before. Make sure your staple gun is always loaded properly and that you’re using the right size staples for the job. Remember to take breaks and stretch your hands, fingers, and wrists to avoid strain or injury.With patience and practice, using a staple gun can become second nature. So go ahead and tackle those DIY projects with confidence knowing that you have the skills to handle your trusty staple gun.
Repeat step 3 until you’ve completed your stapling project.
Keyword: stapling project. Now it’s time to repeat the third step of your stapling project until everything is completed. But wait, don’t let that sound tedious or overwhelming! Remember that the more you practice, the better you become.Each round of stapling provides an opportunity to reevaluate your technique and make adjustments accordingly. Plus, as you gain more experience, you may notice yourself working faster and more accurately than before. So, let’s get going! Keep those sheets lined up and feed them through the stapler with confidence.
Soon enough, you’ll have a finished product that you can be proud of. And isn’t there a sense of satisfaction that comes with seeing a task through to completion? Like seeing the last puzzle piece fit perfectly into its spot, finishing your stapling project can leave you feeling accomplished and ready for what comes next. So, don’t hesitate to repeat and practice until everything is perfect—the results are worth it!
Additional Tips and Precautions
When using a staple gun, there are some additional tips and precautions to keep in mind to ensure your safety and the best results possible. Firstly, always wear protective eyewear and gloves to shield your eyes and hands from any flying debris or accidental staple punctures. Next, make sure that the staple gun is loaded with the correct size and type of staples for your project.Using the wrong staples can cause jams or damage to your materials. When handling the staple gun, keep your finger off the trigger until you are ready to shoot the staple to avoid any unintentional firing. It’s also important to use the staple gun in a stable and flat surface to avoid any misfires or accidents.
Lastly, store the staple gun in a secure location where children or pets cannot access it, and always follow the manufacturer’s instructions and recommendations for proper use. With these additional tips and precautions in mind, you can use a staple gun effectively and safely.
Always wear safety goggles and gloves when using a staple gun.
When it comes to using a staple gun, safety is paramount. Along with wearing safety goggles and gloves, there are additional tips and precautions to keep in mind. Firstly, make sure to switch off the staple gun and unplug it when not in use.
This will prevent any accidental discharge or misfires. Additionally, always check the staples before loading them into the gun and make sure they are the correct size and type for the project. It’s also important to keep your hands and fingers away from the staple gun’s muzzle while it’s in operation, as it can cause serious injury.
Finally, be sure to store your staple gun in a safe and secure place, away from children and pets. By taking these extra precautions, you can ensure that you use your staple gun safely and effectively for all your DIY projects.
Never aim a staple gun at another person or animal.
When it comes to using a staple gun, safety should be a top priority. Never aim a staple gun at another person or animal, even if it’s unloaded or malfunctioning. Accidents happen, and a staple can easily penetrate the skin, which can lead to infection or more serious injuries.
Additionally, always wear eye and ear protection while using a staple gun. Staples can fly off in various directions, and the loud noise can cause hearing damage over time. Before using a staple gun, read the instruction manual and take precautions to ensure a safe and efficient experience.
Remember, the key to using any tool is to respect its potential danger and treat it with the utmost care.
When finished, store the staple gun in a safe and secure location.
When it comes to using a staple gun, it’s important to follow the proper steps for safe use and storage. Once you’ve finished using the staple gun, it’s crucial to store it in a safe and secure location. This will not only help prevent any accidents but also prolong the lifespan of your tool.
One great way to keep it safe is by investing in a sturdy toolbox or case specifically designed for staple guns. This will not only keep it away from curious children or pets but also keep it protected from any damage caused by dust or moisture. Additionally, it’s important to handle the staple gun with care and focus on your task at hand to avoid any accidents.
Remember to always wear safety goggles, keep your hands away from the staple area, and unplug the gun when it’s not in use. Following these additional tips and precautions will help ensure safe and successful staple gun usage every time.

